Ground Image Overlays
Note: Image overlays work for every map and map type except Google Maps. This might change in favor of Google Maps if Google fixes issues related to image overlays (performance and memory consumption).
What are image overlays for?
With image overlays, you can add images as part of a map. This can be a fantasy world prepared by someone:
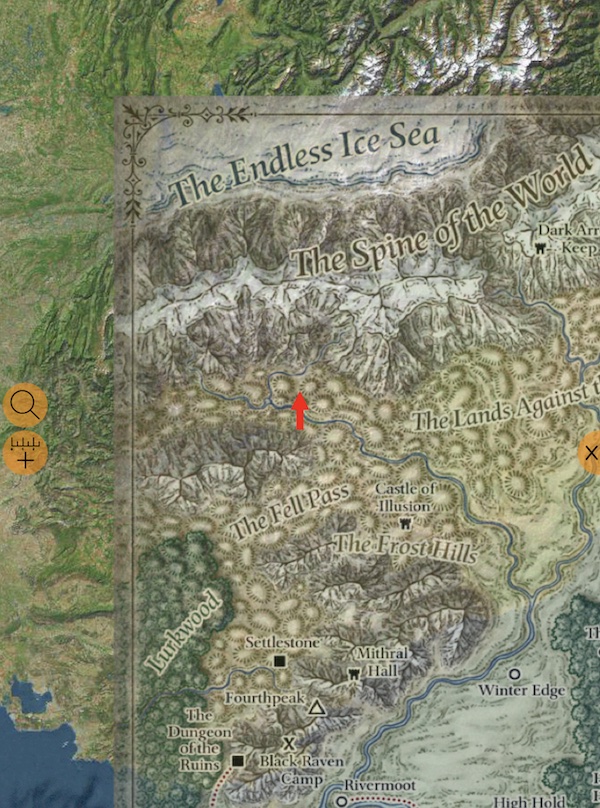
Source of the world’s kmz file: http://realms.altervista.org/DnD/Traveller/earth.php
Or it can be a paintball game event map:
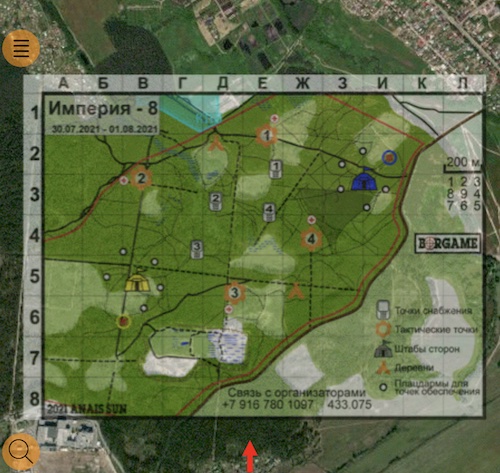
Source: vk.com/borgames
Your carefully crafted building plan:
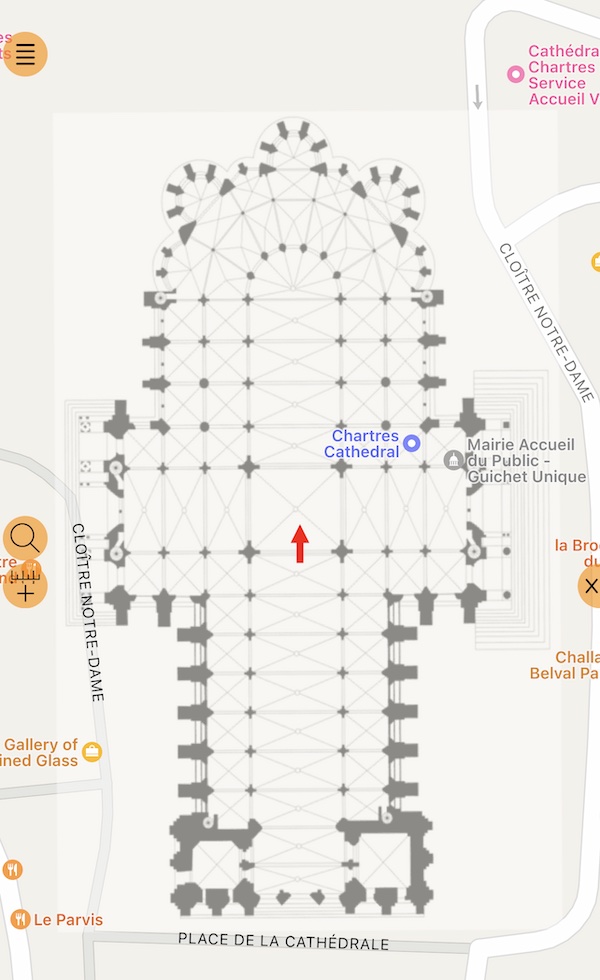
Source: wikipedia
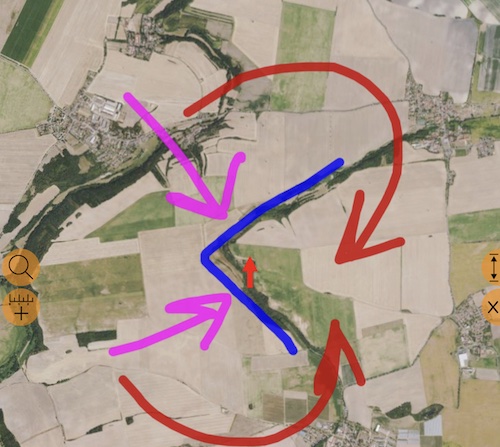
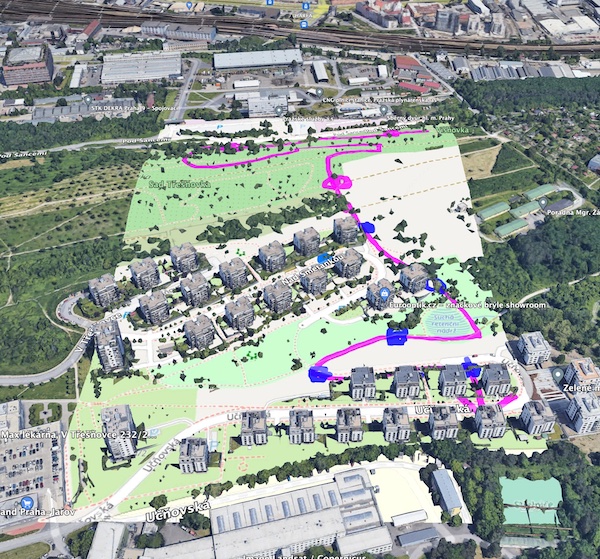
Or your very own freehand draft of a tactical game plan:
Or explanations of some grounds and access paths:
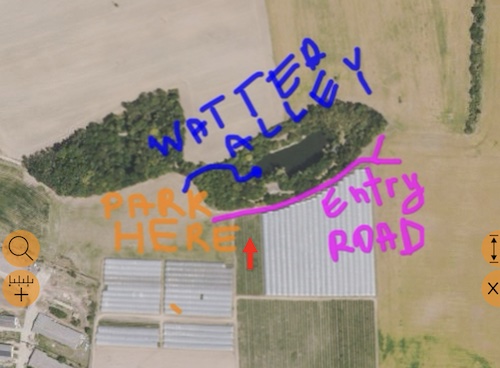
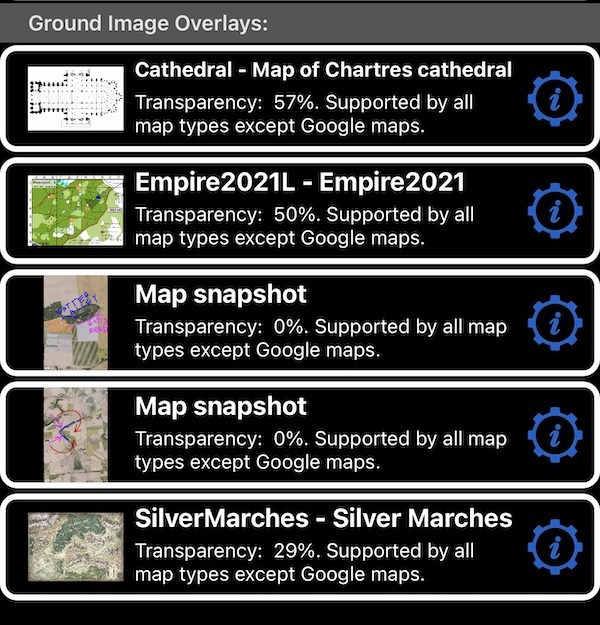
All of the above are image overlays that you can either import or create yourself in the app. Here are all of the above sample image overlays, in the new “Ground Image Overlays” section in the maps list:
How do I add image overlays to the app?
Kmz file import.
You can import image overlays from kmz files by tapping on them and ‘Open in’ in the app. The app will add the image overlay to the “Ground Image Overlay” section in the maps list, enable it (shown on the map), and assign it a default transparency of 50%.
Create image overlays directly in the app.
Here is how:
Move the map to the position where you want to take a map snapshot. Move the map manually or use the search button on the map. If the search button is not visible, move the map a little bit to switch it from the navigation mode when the map centers on your location to the browse/edit mode. By using the search button you can move to the address, coordinates or existing point.
Make sure that the map is not pitched/tilted (move two fingers down on the map to make sure the map is “flat”) and that the map points exactly to the north (rotate the map with two fingers until the direction label shows 0 degrees).
Now use the compass button on the map:

to show the browse mode map options. The options in this menu may differ between apps (e.g. saving the map snapshot is the only option available in the Planimeter 55 app).
- Use the “Save map snapshot as a ground image overlay”:
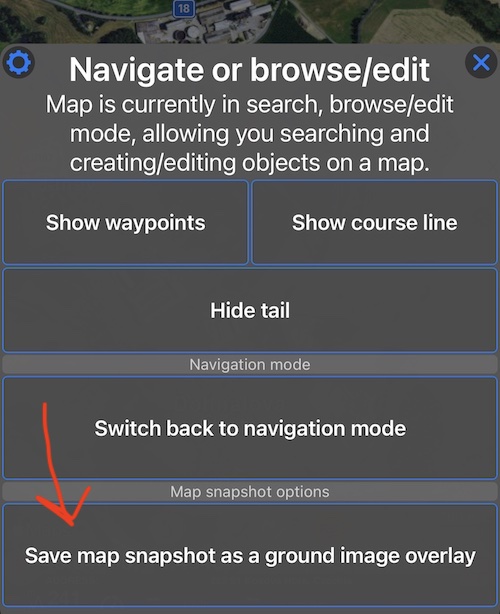
This will take a snapshot of the map as you see it, including points, routes, areas, or circles on the map, and save it as a new ground image overlay.
- Open the maps list by tapping on the layers button:

Here is our new overlay in the “Ground Image Overlays” section:
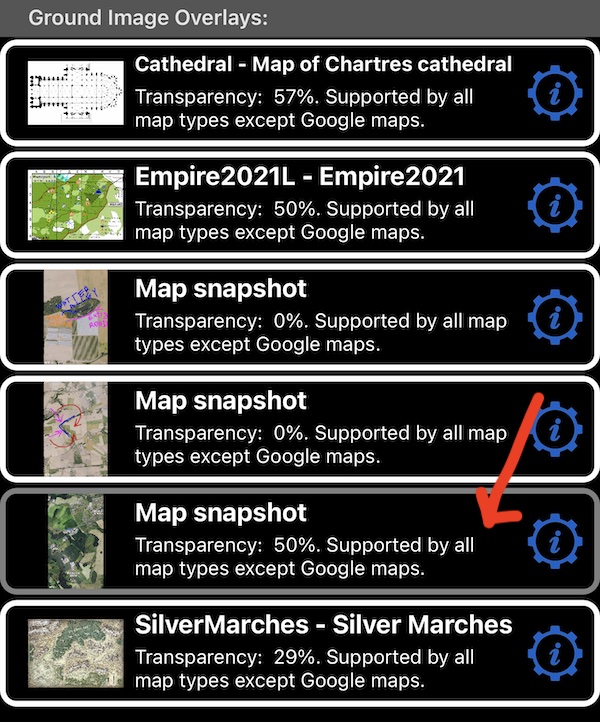
By default, the app assigns the name “Map snapshot” to the overlay, makes it 50% transparent, and disables it (not shown on the map).
To make the overlay visible on the map, tap on its row. To disable, tap again.
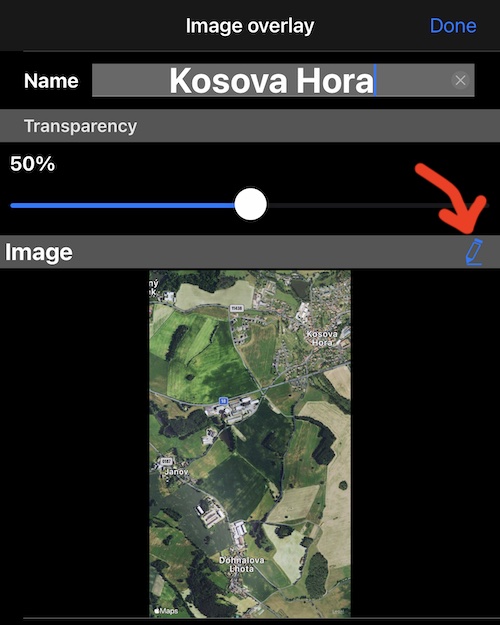
To change overlay settings and add freehand drawing on top of the overlay, tap on its settings button to show the overlay settings screen. You can change overlay name and transparency here. To draw on top of the overlay, tap on the “pen” button:
- In the image editor you can tap on the pen color tool to change the pen color. You can zoom in/out and move the image using two fingers. One finger draws:
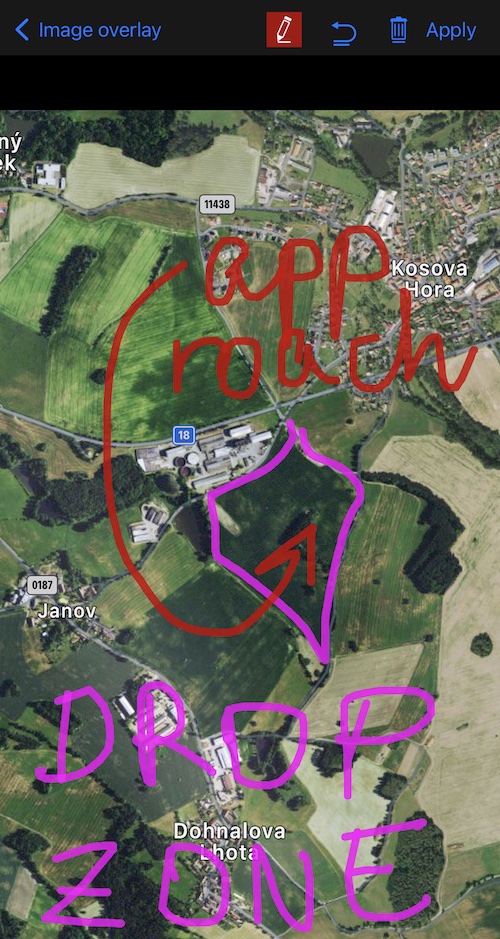
You can undo your drawing stroke by stroke. When done, tap on “Apply” - this will merge your drawing into the overlay image.
- Now back on the map, you can see the results of your work:
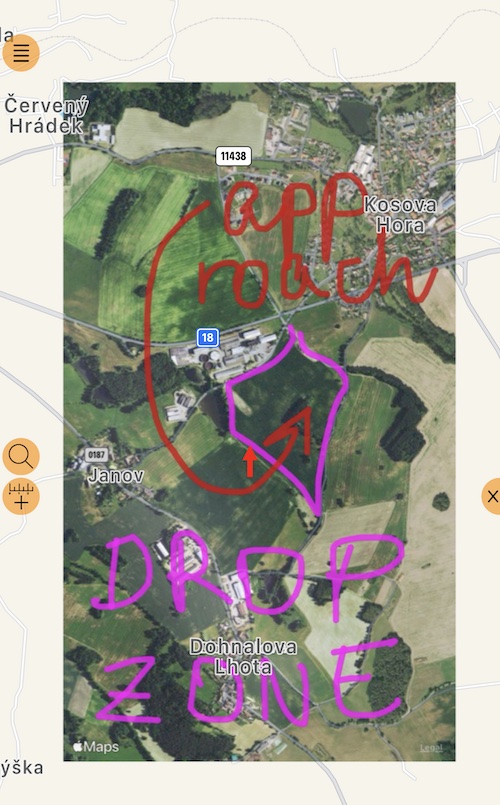
We created our image overlay with the satellite map snapshot, but added it to the street map above.
In fact, you can create a snapshot of any map and map type (except Google Maps) and add it on top of any other map — online, blank, or offline (except Google Maps again).
Sharing image overlays.
You can share/export image overlays as kmz files. This way you can send them to the users of this same app or any other app that supports kmz ground image overlays, like Google Earth.
In our family of apps, kmz ground image overlays are supported in Planimeter 55, Compass 55, GPS Team 55 and Speedometer 55.
Here is an example of an overlay created in the app and shown in Google Earth:
Finding image overlays on the map.
Follow these steps to find and review an image overlay on the map:
- In the maps list, swipe on the overlay row from right to left and then tap “Copy center coordinates”.
- With the coordinates in your pasteboard, return to the main map and use the search button > Coordinates > Paste > Done to move the map to the overlay center. If the overlay is not visible, check if your zoom level is too low. Zoom in. If the search button is not visible, move the map a little bit to switch it from the navigation mode when the map centers on your location to the browse/edit mode. By using the search button you can move to the address, coordinates or existing point.
Troubleshooting.
Map snapshot menu shows “To take map snapshots, ensure the map is not tilted and is oriented strictly by north”.
Make sure that the map is not pitched/tilted (move two fingers down on the map to make sure the map is “flat”) and that the map points exactly to the north (rotate the map with two fingers until the direction label shows 0 degrees).
Can’t find map snapshot on the map.
See Finding image overlays on the map.
Related:
- Offline maps
- Import existing mbtiles, Rmaps, sqlitedb maps
- Export/share offline maps
- Convert your existing map (e.g. GeoTiff or PDF) into a format supported by the app
Got a kmz file for your paintball gaming ground, fantasy world, park? Feel free to send it to support@blocoware.com and I’ll make sure that users of my apps can find them easily and add them to the app.