Track categories. Do more with the miles you track.
Available from version 3.2
Track category information can be used for a tax deduction or reimbursement purposes.
If you don’t need to assign any categories to your tracks, have no worries, categories are dormantly hidden and should not complicate your work with the app, until you need them…
If you believe categories may help, continue reading.
Assigning and viewing categories
You can assign a category when you create a track or later when you review it.
Following tracking categories are available:
Business, Personal, Medical, Charity, Other.
MENU > “NEW TRACK” button now shows the default category option (#1) for your new tracks:
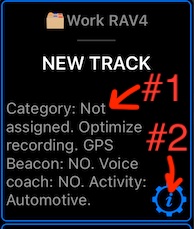
If needed, use settings button (#2) in the “NEW TRACK” menu section to open the tracking settings screen:
![]()
Tap on this settings row to pick a default for the new tracks:
![]()
Options:
Ask when track starts - Just before the track recording starts the app will ask you to pick a category for the track.
Not assigned - Is the current default and doesn’t assign any category to tracks as they are created.
Business, Personal, etc - A specific category to assign to the track on its creation. Usefull if most of your driving happens withing a single category.
Category for the track can be assigned at any moment in its lifetime.
To assign a category, do MENU > TRACKS and:
A. Either swipe from right to left on the track row:
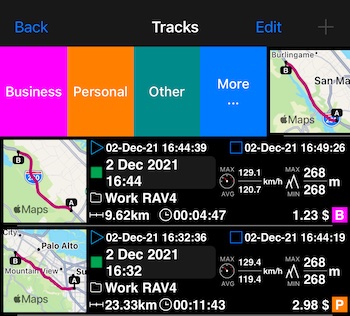
And pick the category by tapping on one of the buttons here (if desired category is not in the short list, tap on “More” to see all categories).
B. Or if you have already opened the track preview by tapping on the track row, use the category assignment button:
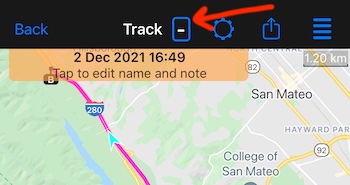
“-” is used to denote a category, that is not assigned yet. Where a concise view of a category is needed, only its first letter is used, as in the tracks list:
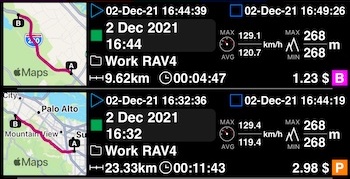
B stands for Business, P for Personal, in the tracks list.
This is it for how you assign categories to tracks. Let’s move to filtering and exporting categorized lists!
Filtering tracks with certain categories or without category assigned.
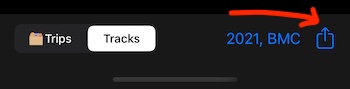
In the tracks list, tap on a bottom filter button:

To open a filter screen:
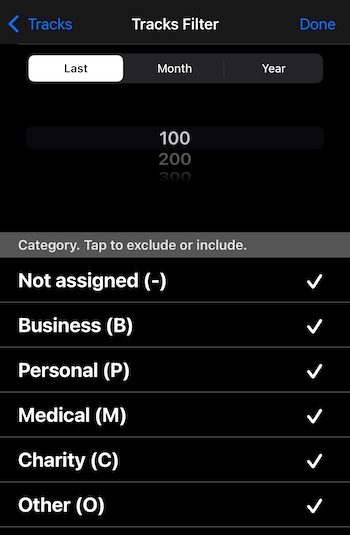
Version 3.2 adds “Year” option to the filter, so you can select tracks for the whole year (e.g. for an annual tax deduction report). But most importantly, it adds a category filter section, that allow you to only track with certain categories or with no category assigned.
Date based and category filters are combined, so you can select tracks for the certain month/year or year, plus only with certain categories assigned.
CSV/Excel report with categories.
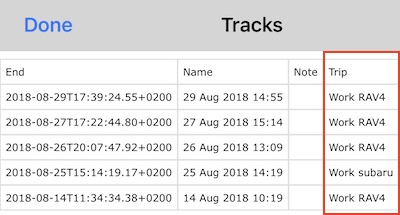
Having the right filter applied (e.g. Year 2021, Categories: Business + Medical + Charity), tap on an Action button in the tracks list:
Pick “Export to Preview” - this is the most universal option where you can preview the file and pick further actions on it - to share or to open in “Numbers” or “Excel” app on your device.
Category column is the right most in the report (#1):
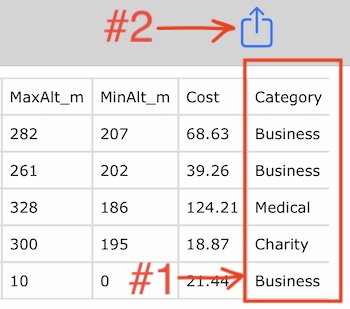
Use the mentioned action button (#2) to share or open this report in the more specialized apps like “Numbers” or “Excel”.
Also version 3.2 adds a “trip name” column, so you can destinguish by a trip/car - whatever your trip/folder represents for tracks: