GPS Camera 55. Version 1.6.
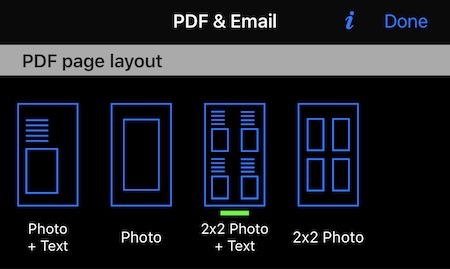
PDF report page layout.
From version 1.6 you can pick from 4 available page layouts.
If you’d want to add a layout, please contact me at: support@blocoware.com.
**###
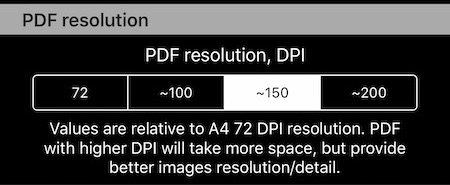
PDF output resolution.
###**
This starts to be important when you put more than one image to a PDF page.
Prior to version 1.6, the only available resolution was 72 dpi. Images and overlays would loose a lot of detail when put 2x2 onto a single page.
Setting DPI to higher values will make PDF documents bigger, but will allow to keep image/overlay details for 2x2 layouts.
**###
Text fields added on top on an image in PDF or Email (and other social sharing options).
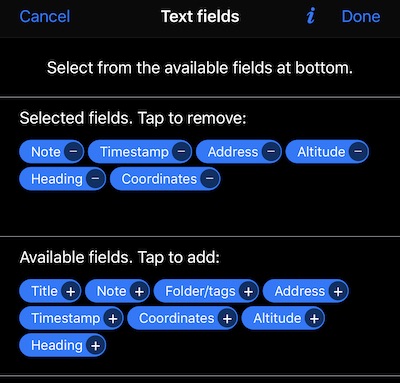
By default, app shows plenty of text above each image in the PDF file. From version 1.6 you can precisely define which fields do you want to be shown on top of the image in report/export. This is again in the Settings > PDF & Email:**
Tap on the row with fields list and pick which text fields should be shown on top of the image in PDF report or Email:
Coordinates lock.
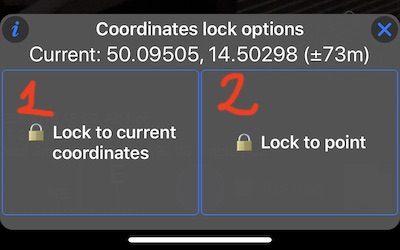
Tap on a coordinates lock button:
to see the options:
You can lock coordinates to the current location or any existing point in the app. Why this can be useful?
Option 1. Locking to the current coordinates.
When taking photos inside the building - the moment you enter the building, GPS signal is lost most of time and location reported by iPhone/iPad will start to jump all over the place.
With coordinates lock, you can lock the coordinates just before entering the building/garage - when clear view of sky is still available and accuracy of location is high. This would be the case to lock to a “current coordinate”. You take series of photos then, all linked to that accurate location and unlock the coordinate when needed.
Option 2. Lock to a point.
Also, you can create a point in the app (MENU > POINTS> + button), place it on a map to precisely any point you want and then lock the coordinates to this point’s location. This option enables setting coordinates to any value, search on a map, etc - as these are options that point editor provides. Given you have such a point setup, tap on that location lock button, pick “lock to a point” and tap on a point you pre-prepared for the exact photo session location.
Removing the lock.
When coordinates are locked, “location lock” button will change its icon and will blink to avoid you forgetting about the “lock”:
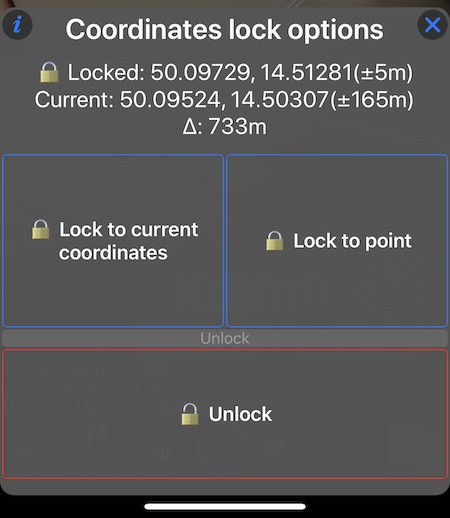
Tapping on “location lock” button will reveal menu showing locked coordinates, current coordinates and distance between them. Plus options to “unlock” or lock to current location (at this moment) or a different point:
More “lock” options to be added in the future versions. “Lock to a point” provides a lot of flexibility in locking to any location or map point, but more shortcut ways of locking can be introduced (like locking on map with no need to create a point first).
