Version 6.4 - What's new?
Two things carry version 6.4. The Rally computer becomes a complete rally instrument, and a track can now record the vehicle’s motion with no video at all and turn it into overlay videos for footage you filmed on another camera. The camera screen changed as well — the focus, the lens and the moment of capture are yours to decide now — and that part is collected further down, for those who use it.
The whole rally in one file — and on one screen
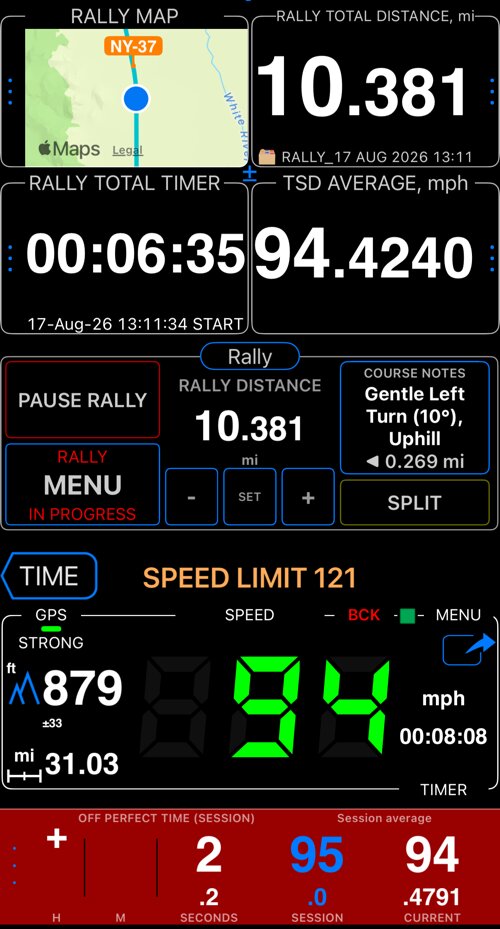
A rally book is one file that carries the event: its name and logo, the target average speed, the course notes, the checkpoints and the route. Load it once and the app is set up for that event — then share the same file with the whole team.
- Course notes that follow your distance. The next instruction appears by itself as you drive, with the distance still to go and the mile marker — and it can be read aloud ahead of time, so the co-driver keeps their eyes on the road.
- A route editor for a road you have not driven yet. Tap or trace the road on the map, follow the road or go straight, and apply it with its terrain, its course notes and tulip diagrams for every turn.
- A live route map , right in the gauge grid. Small on purpose: your position, the course, the checkpoints and the notes, turned so what is ahead is on top.
- One-tap loading from the rally library , or a book imported from Files. Everything you load stays in My rallies.
- A printable road book — title block, summary, route map, segment table and the course notes in road-book columns.
- Start at a time of day, and an odometer you can trust: off perfect time over the whole session , a split at a landmark, and geo anchors that re-sync the distance at checkpoints you have passed.
- Build a rally from your own data — a waypoint collection becomes course notes, a track becomes the route.
Open the complete Rally computer guide.
Your gauges on someone else’s footage
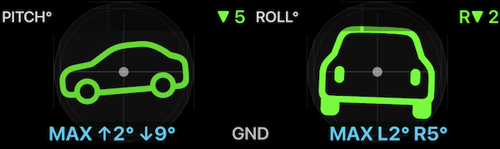
A track can now record the vehicle’s motion — and, if you want it, a clap for synchronisation — while recording no video at all. Afterwards the track’s own screen exports Pitch & Roll, G-Cross, Speed and Map as separate transparent videos: telemetry overlays to lay over the footage you filmed on a GoPro, a DJI Osmo, an Insta360, a dashcam or another phone, in iMovie, Final Cut Pro, DaVinci Resolve, Adobe Premiere Pro or CapCut.
Tracks that carry motion data also gain a Map + pitch & roll + chart view, where the chart cursor scrubs the map marker and the two instruments together.
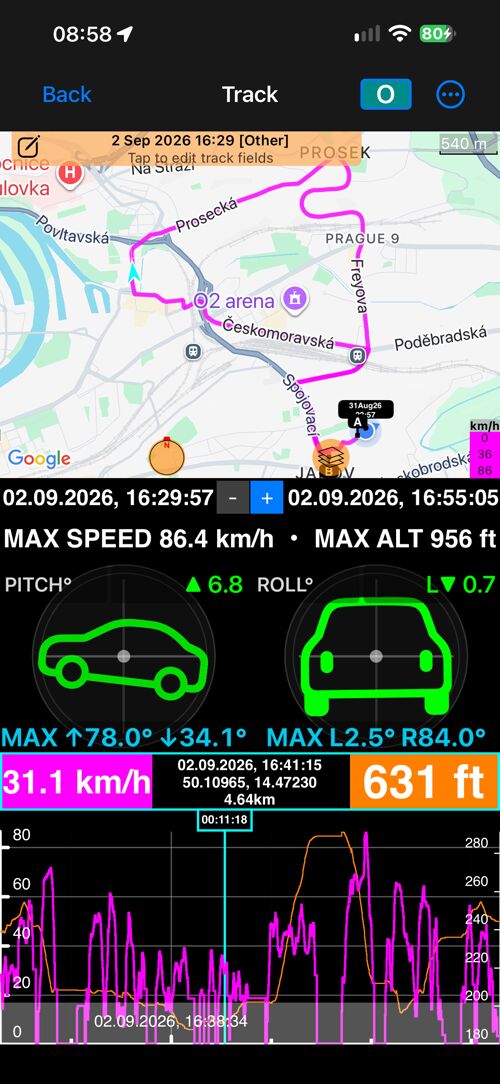
The same export works on video recorded in the app, from
More > Full video > Overlay videos.
Overlay videos from a track. · From a recorded video.
A map of our own, made for offline use
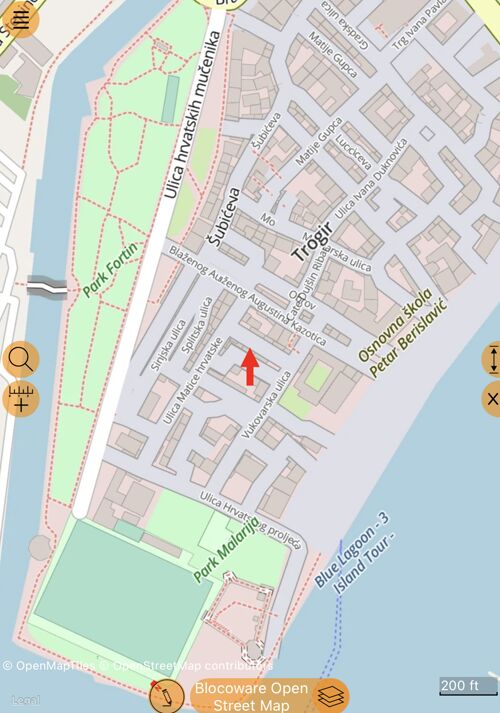
Blocoware Open Street Map is an OpenStreetMap raster map served by us: streets, tracks, paths, buildings and place names worldwide, drawn at retina resolution so labels stay sharp, turning with your heading, down to zoom level 17.
It is the source you take offline. OpenStreetMap’s own volunteer tile service does not permit bulk downloads — this one is built for it, region by region, up to 8,000 tiles per download, resuming where an interruption left off. Browsing it online is a beta-only preview; the App Store version offers it for offline downloads.
More on Blocoware Open Street Map.
The camera, when you use it
The camera screen changed as much as the rally computer did: autofocus, the lens and the moment of capture used to be the app’s decisions, and in 6.4 they are yours — without taking a single option away from anyone who never opens these menus. Each one has its own page.
Focus — lock it, save it, or set it by hand
Behind a windscreen, autofocus hunts between the glass and the road. On a shelf you photograph every week it settles a little differently each time. Neither is a setting problem — it is autofocus doing its job on the wrong subject.
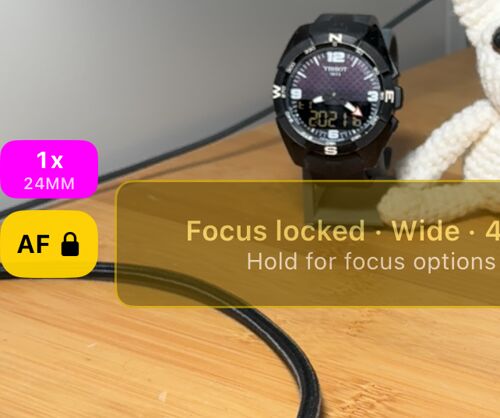
The AF button is now always on the viewfinder. A tap locks focus where it is; exposure keeps adjusting, so a tunnel or a low sun still gives you a usable frame. Hold it and you get the rest:
- Save current focus stores the distance you are on, per lens. Lock at saved focus returns to it on any later visit.
- Set focus by hand opens a dial: slide it, watch the picture, stop where you want.
- Focus at start does any of it automatically the moment the camera opens.
Lenses and zoom — AUTO, or one lens by name
An iPhone with several cameras normally hides them behind one zoom slider. That is right for snapshots and wrong for a repeated shot, where two photos of the same thing should be taken through the same glass at the same framing.
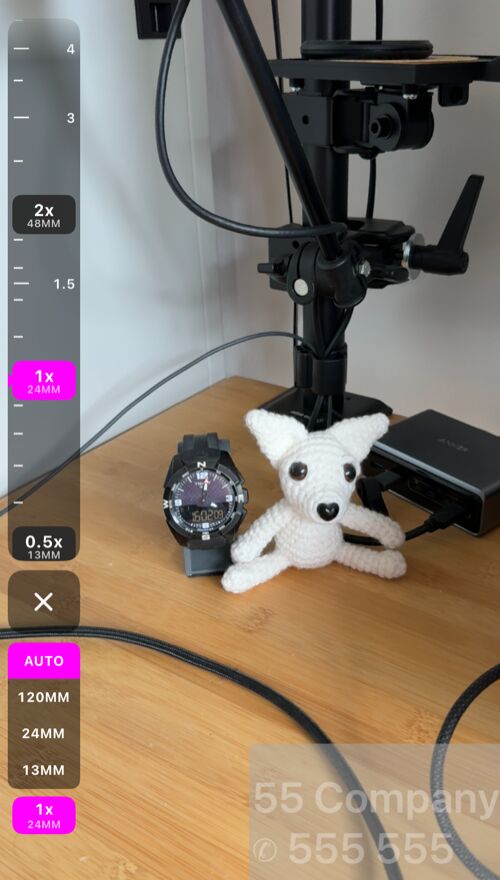
- The lens strip puts every lens stop on a dial you can drag or tap, and a lens selector underneath: AUTO, or one focal length. Pick a focal length and the picture never changes lens on its own again.
- The zoom chip always names the lens actually doing the work — so you can see when iOS has quietly served a close-up from the ultra-wide instead.
- A single selected lens now zooms to its sensor’s maximum, with the dial dimmed past the point where iOS stops recommending it.
- Every lens and the whole zoom range are free. Only remembering the lens and zoom you used last needs the paid version.
Shutter timer — 1, 3, 5 or 10 seconds before the shot
A finger on the screen moves the phone, and on a pole, a mast or a tripod that is exactly the shake you were trying to avoid.
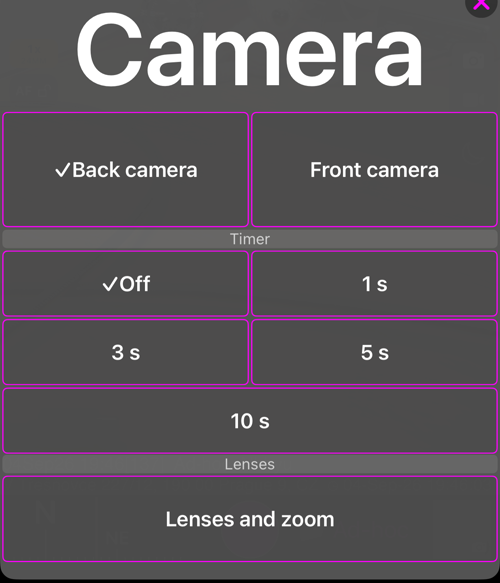
The camera button at the top of the screen now opens a sheet with a shutter timer — 1, 3, 5 or 10 seconds. A ring counts down around the shutter and a second tap cancels it. Starting a video recording counts down too; stopping never waits, and neither does a Bluetooth remote or the hardware buttons, which are already shake-free.
Viewfinder controls — gestures, black screen, video light
Every option here is off by default — a camera you never configure behaves exactly as it did before.
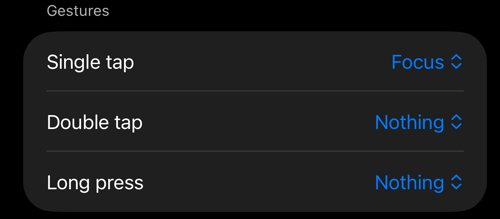
- Assign Single tap, Double tap and Long press to focus, the shutter, a focus lock or a black screen. Useful with gloves, or with the phone in a mount you cannot comfortably reach.
- The black screen keeps recording with the display dark, for a long recording from a windscreen at night. A double tap brings the viewfinder back.
- In video mode the flash button becomes a video light switch with its own brightness.
- The AF and microphone buttons can be set so a tap only reports the state and every change lives in the hold menu — a stray touch while driving then changes nothing.
Every waypoint value, and where it came from
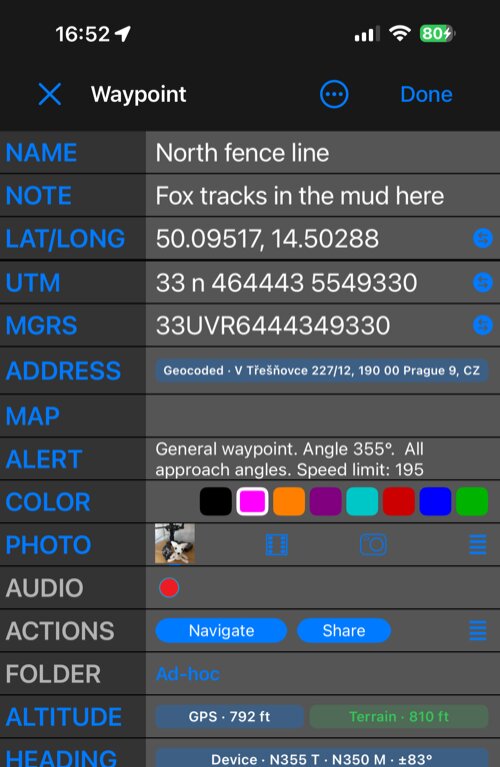
The waypoint editor now has two views. Simple is the familiar compact editor and stays the default. Advanced shows where each value came from — the GPS, the terrain, what you typed, the photo itself — and lets you pick the one you trust for altitude, address, heading and course, or type one in yourself, which the editor could not do before. Nothing changes until you tap Apply.
The attached photo is kept in step field by field: Photo sync says how many values differ, and you choose once what Done should do about it — ask, write silently, or leave the photo alone.
More on the Advanced waypoint editor. · The waypoint editor.
Getting there
Open the Rally computer with main MENU > MODES > Rally computer; the rally
control panel menu offers Open rally settings. The camera is the button
beside the waypoint button in MENU, and everything on the camera screen has
its own page:
Focus
,
Lenses and zoom
,
Shutter timer
and
Viewfinder controls
. Motion data for tracks is turned
on in the GPS tracking settings — the settings button inside the NEW TRACK
button — under Motion and audio data.
Related
- Rally computer · Rally book · Route editor · Course notes · Route map · Rally library · Session options
- Blocoware Open Street Map · Offline maps
- Overlay videos from a track · Video recording, replay, and data overlays
- Focus · Lenses and zoom · Shutter timer · Viewfinder controls · Camera lenses
- Waypoint editor: Advanced · The waypoint editor
- What’s new in version 6.3
❤️ Enjoying the app and its updates? Please consider leaving a rating—it means the world to us!
