Compass 55. The waypoint editor: name, note, coordinates, address, map, photo, audio, and sharing.
A waypoint holds where you were and what you found there. This page walks the editor as it opens — the compact Simple view, which is what you get until you choose otherwise. There is also an Advanced view that shows where every value came from and synchronises the waypoint with its attached photo field by field; it gets its own page.
Opening a waypoint
Tap a waypoint on the map and choose Open in the callout it raises, or use MENU › Waypoints to find it in the list and tap its row.
The editor opens over the app. Done saves, and ✕ leaves without saving.
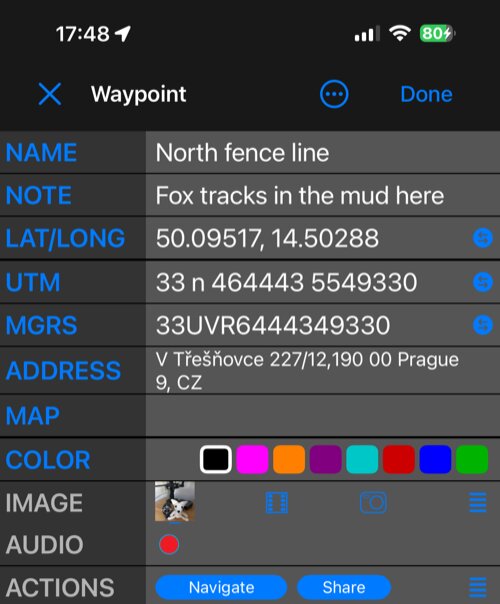
The rows
- Name — the waypoint’s title. A fresh waypoint names itself from the date and a counter until you type your own ( below ).
- Note — free text, right under the name so the field you touch most never moves ( below ).
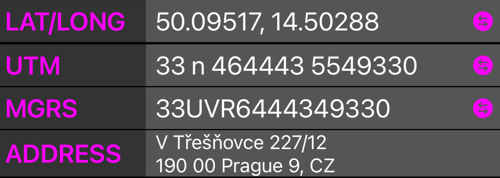
- Lat/Long · UTM · MGRS — the same position in three notations; edit whichever you think in and the other two follow. The little ⇄ button on each row opens the coordinates converter loaded with that format ( below ).
- Address — the address the waypoint carries. Tap the title to open it ( below ).
- Map — tap the title and a map opens inside the editor, with the waypoint at its centre ( below ).
- Color — the waypoint’s color on maps and in lists; tap a swatch.
- Image — the attached photo. Tap the thumbnail to open it full-screen with the drawing tools; the buttons beside it take a new photo, pick one from the library, and open the photo’s options.
- Audio — record a voice note for the waypoint, and play it back.

- Actions — Navigate hands the waypoint to turn-by-turn guidance (with or without recording a track as you go); Share sends the waypoint with its photo and details.
- Folder — which collection the waypoint lives in; tap to move it.

Name and note
Tap the NAME title and the row opens into a field with the current name in it:

NOTE works the same way and gives you as many lines as you type:
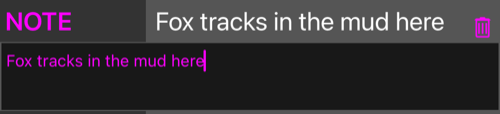
The row’s own bin button empties the field. Tapping the title again folds the row away; the keyboard’s return key does the same for the name. Nothing is written until you tap Done — and if the waypoint has a photo, the name and the note are two of the things the photo can be told about ( below ).
Changing the position
Four ways, and they all end up in the same three coordinate rows.
Type it. Tap Lat/Long, UTM or MGRS and edit the value; the other two rows follow as you type.
Move the map. Tap the MAP title and the map opens inside the editor:
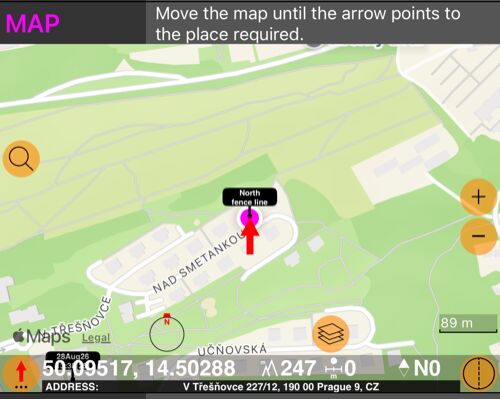
The arrow stays in the middle and the map slides under it — move the map until the arrow waypoints to the place required. The bar underneath tracks what is under the arrow: the coordinate, the altitude, and the address. Tap the MAP title again to fold the map away.
Convert or paste one. The ⇄ button on each coordinate row opens the coordinates converter loaded with the waypoint’s position in that row’s format:
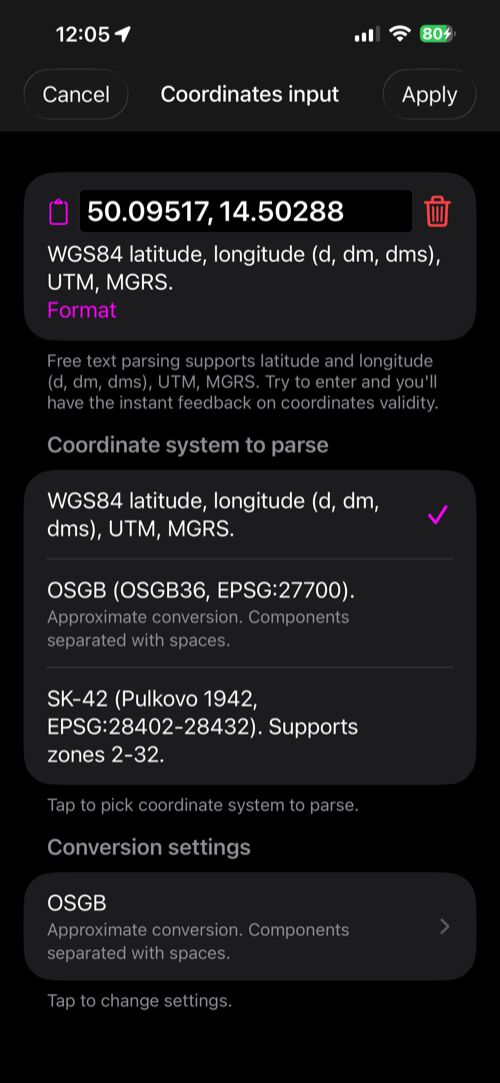
Paste anything the parser understands — degrees, degrees-minutes, UTM, MGRS, OSGB, SK-42 — and Apply brings the result back and moves the waypoint to it. Cancel leaves the waypoint where it was.
Search for the place. In the address, below.
Whichever way you use it, the waypoint’s new position is its own: it is recorded as a manual coordinate, and the Advanced view will say so.
The address
Tap the ADDRESS title to open the row:
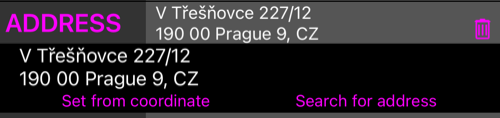
- The two lines are yours to type in — a name for the place, a room, a mooring, whatever the geocoder cannot know.
- Set from coordinate looks the address up for where the waypoint is now. It replaces whatever the row held.
- Search for address finds a place by name — and in the Simple view it does both halves of the job: the waypoint takes the address and moves to the place found.
- The bin button clears the address.
Moving the waypoint does not re-run the lookup: the address you had stays until you ask for a new one. The Advanced view is where a stale address is flagged as Coordinates changed, where the photo’s own address is offered, and where a search result can be applied without moving the waypoint.
The ⋯ menu
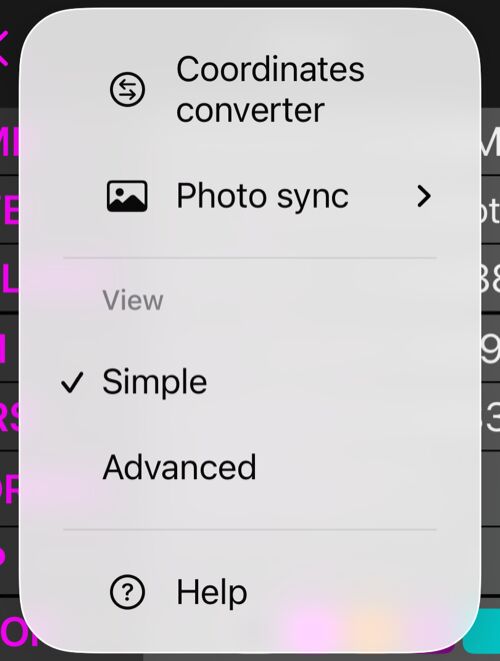
- Coordinates converter — the full converter, including formats beyond the three rows.
- Photo sync — what the attached photo stores compared with the waypoint, and what saving should do about it (below).
- View — Simple or Advanced. The choice is remembered and is only a change of presentation: switching never saves, discards or alters a value.
- Help — this page.
Saving, when a photo is attached
A photo taken by the camera carries a copy of some of the same facts — position, altitude, heading, the note, the title. When you change one of those on the waypoint and tap Done, the app asks what the photo should be told:
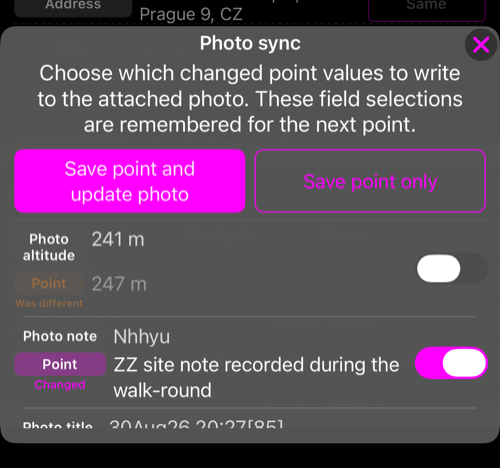
Every differing field is a row — the photo’s value above, the waypoint’s below, and a switch deciding whether it gets written. Fields you changed in this edit start on; differences that already existed start off, because a difference you did not create may well be deliberate. Save waypoint and update photo writes the switched-on rows and saves; Save waypoint only saves the waypoint and leaves the photo untouched.
If you would rather never be asked, pick a standing behaviour under ⋯ → Photo sync → When saving:
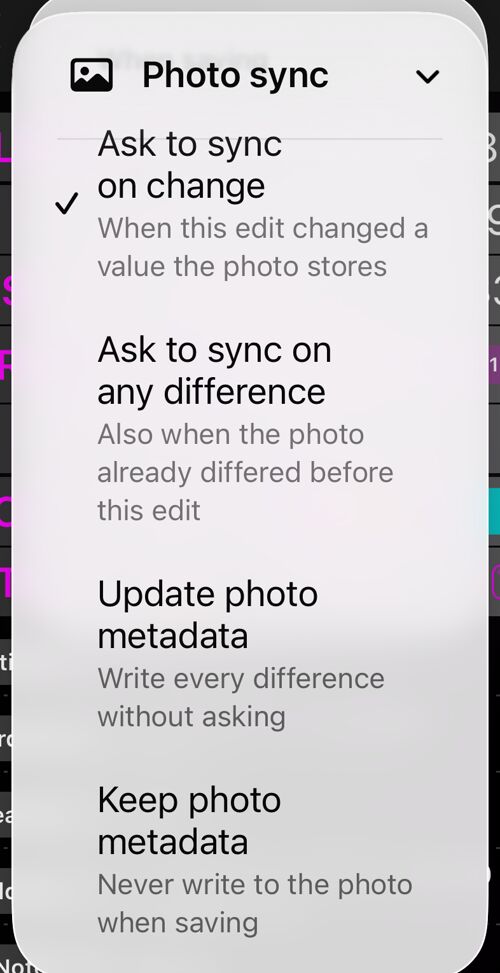
- Ask to sync on change — the default: ask only when this edit changed something the photo also stores.
- Ask to sync on any difference — also ask when the two already disagreed.
- Update photo metadata — write the differences without asking, then save. It only ever replaces values; it never removes one.
- Keep photo metadata — always save the waypoint only.
However it is written, the picture itself is untouched: same pixels, same quality, no re-compression — only the descriptive fields change. Field-by-field control in both directions, and removing a value a photo should no longer carry, live in the Advanced view .
Related
- Waypoint editor: Advanced — sources, candidates, and photo sync field by field
- Coordinates converter — also reachable from this editor’s ⋯ menu
- Map snapshots for waypoints — the small map attached alongside the photo
- Waypoints in GPX — getting waypoints in and out
