Photo capture settings: what happens when you press the shutter
Compass 55 keeps one screen for the decisions you make before the shutter: what happens to a photo the moment you take it, where copies of it end up, and what the camera should trade for what. Everything about how a photo looks — the stamp, the notes, the colours, the watermark — lives on its own screens, listed at the bottom of this page.
Open MENU > SETTINGS, then Photo capture settings. The row shows what is
set without opening it: After capture: Preview, Photo quality: Medium, Save: ….
After photo capture
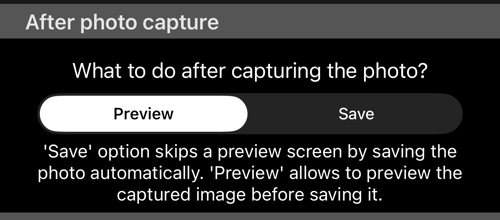
- Preview — the default. The shot opens in the preview first, so you can look at it, annotate it with the drawing tools , change the notes that will be stamped into it, or throw it away before anything is saved.
- Save — skips the preview and saves immediately. This is the setting for working fast: a survey where you photograph twenty things in a row and sort them out afterwards.
Nothing is lost by choosing Save. The photo still arrives in the app with its
location, direction and notes attached; you are only giving up the chance to
correct it at the moment of capture.
Where the photo is saved
The app always keeps its own copy of every photo. What this section decides is whether an extra copy also goes to the photo library.
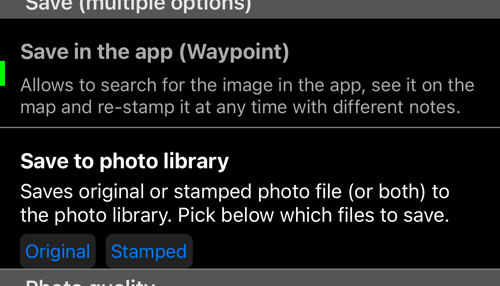
The first row is not a switch: the app’s own copy is always written. What follows is what you choose, and those are not alternatives — turn on as many as you want.
- Save in the app (Waypoint) — always on, and not something you can switch off; the row is there to explain the copy you always get. It is what makes the photo searchable: it appears in the waypoint list, it sits on the map where it was taken, and it can be re-stamped at any time with different notes or a different layout, because the app kept the original and applies the stamp on demand.
- Save to photo library — a file in Photos, for the usual sharing and backup.
Each external destination has its own Original and Stamped choice, and
you can pick both. Original is the clean picture as the sensor saw it;
Stamped is that same picture with the overlays drawn into it. Saving both gives
you one file to edit and one to send.
Photo quality
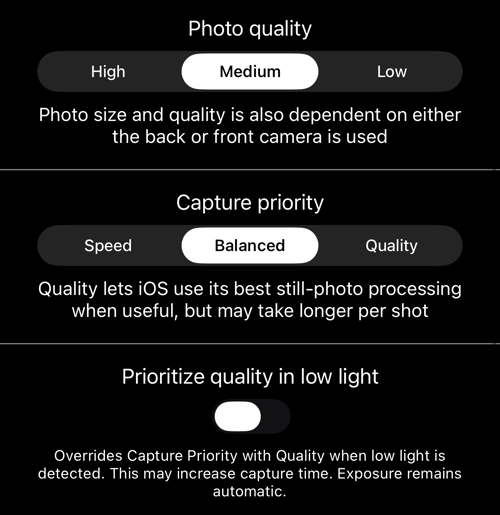
Three settings, in increasing order of how rarely you will touch them.
- Photo quality —
High,Medium(the default) orLow. This is file size against detail. Note that the result also depends on which camera is used: the front camera cannot produce what the back camera does at the same setting. - Capture priority —
Speed,Balanced(the default) orQuality. This is not about the file, it is about how long the camera is allowed to think.Qualitylets iOS use its best still-photo processing when it would help, at the cost of a longer wait between shots.Speedgets out of the way. If you photograph one careful subject at a time,Qualityis worth the wait; if you are working down a row of items,Speedkeeps up with you. - Prioritize quality in low light — off by default. When it is on and the
scene is dark, it overrides Capture priority with
Qualityfor that shot. Capture takes longer; exposure stays automatic. Switch it on if your work happens indoors, in shade, or after dusk, and you would rather wait than get a noisy frame.
A reasonable starting point for most people is the default — Preview,
Medium, Balanced — and then to raise Capture priority to Quality only if
you notice shots you wish were cleaner.
What is not on this screen
As the camera gained options, everything about the appearance of a photo moved
to its own screen. If you came here looking for one of these, it is one row
further down in SETTINGS:
- The stamp itself — coordinates, altitude, direction and the notes drawn
into the picture — has its own screens further down in
SETTINGS, next to this one. - Overlay colours, the timestamp format and the watermark are on their own screens too.
Nothing on those screens changes what is recorded: location, direction and your notes are stored with every photo regardless of what the stamp shows.
Related pages
- The GPS camera — everything the camera screen does, in one place
- Camera lenses — the lenses and where their controls live
- Focus — AF, focus lock, far-only autofocus and the manual dial
- Lenses and zoom — the zoom chip and the lens strip
- Shutter timer — a countdown before the shot
- Viewfinder controls — gestures, the black screen, the video light
- Video recording, replay and data overlays — the same camera in video mode
- Overlay videos from a track — gauges exported without any video
- The waypoint editor — the photo and the waypoint it belongs to
