GPS Camera 55. Viewfinder controls: gestures, focus, black screen, video light, and lenses.
The viewfinder can be set up for the way you shoot: from a windscreen mount, during an inspection, or one-handed. Everything here is optional — with the defaults a tap focuses, a vertical swipe adjusts exposure and a pinch zooms, exactly as before.
This page describes the settings themselves. What the controls do on the camera screen has a page each: Focus , Lenses and zoom and the Shutter timer .
Open the camera screen, tap Settings, then Viewfinder controls.
Gestures
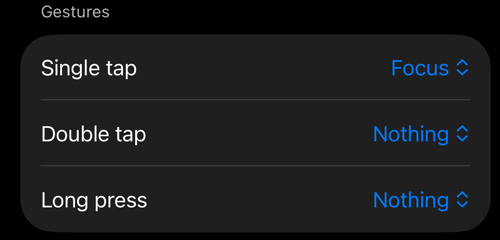
Assign what a tap does on the viewfinder itself.
- Single tap: Focus (default) sets a temporary focus point that ends when the scene changes. Shutter takes a photo, or starts and stops video recording — handy with gloves or a phone in a mount. With a double tap assigned, a single tap waits briefly for the second tap.
- Double tap: Nothing, Black screen, Lock focus, or Shutter. The first tap of a double tap still focuses; that is harmless and keeps single taps instant.
- Long press (half a second): Nothing, Lock focus, Black screen, or Shutter.
Every gesture shows a short confirmation on the viewfinder — for example Recording · Tap · to stop when the shutter is on a tap.
Focus
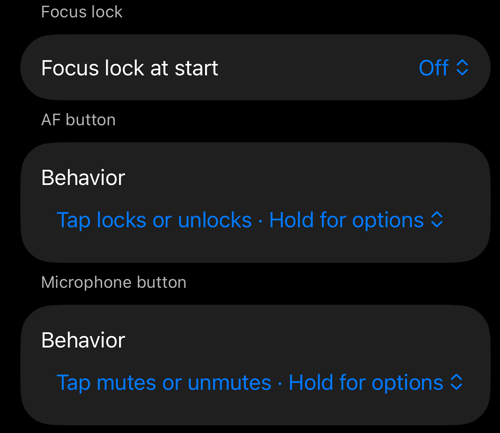
Focus at start decides what focus does every time the camera opens. Off leaves it on continuous autofocus. Restore last lock reopens with the focus you last locked, on the same lens.
AF button → Behavior chooses what a tap on the AF button does: Tap locks or unlocks · Hold for options (the default), or Tap shows the state · Hold for options, which keeps a stray touch while driving from locking or unlocking anything. Holding the button always opens the focus options either way. What locking actually does, and everything in those options, is on the Focus page.
Microphone button → Behavior does the same for the microphone button in video mode: Tap mutes or unmutes · Hold for options, or Tap shows the state · Hold for options. Holding it always opens the microphone options, with Mute and Unmute inside.
Black screen
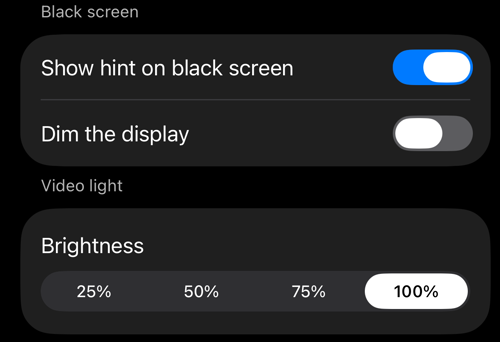
Assign Black screen to a double tap or a long press and the viewfinder goes dark while recording and capture continue — for a long recording from a mount at night, or when the phone must not light up. Double-tap the screen to bring the viewfinder back. Hardware shutter buttons keep working, the phone does not auto-lock, and the video light is turned off while the screen is black. The black screen also ends by itself when a recording stops for any reason other than your tap.
- Show hint on black screen shows a faint car symbol and a short reminder that a double tap brings the camera back.
- Dim the display also turns the display brightness down and restores it afterwards — useful on LCD iPhones, where black is not fully dark. The brightness is restored even if the app is force-quit.
Video light
In video mode the flash button becomes a video light switch — a continuous light, on or off, shown with a flashlight icon and separate from the photo flash. Brightness sets its level (25 % to 100 %). The light comes back after a lens change or an interruption, and turns off under the black screen. iOS turns the light off when the phone gets too warm; the app says so, and switches it back on when it is available again.
Lens
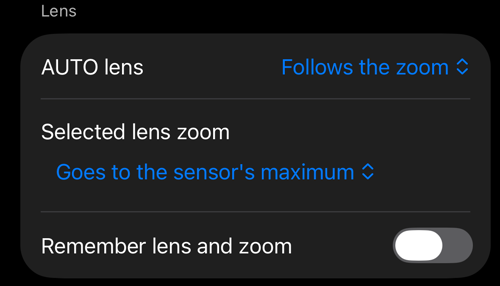
AUTO lens decides how much freedom the automatic camera has on an iPhone with several cameras (it does nothing on a single-camera iPhone). Follows the zoom (default): iOS picks the best lens when you zoom across a stop and keeps it while you hold still. Switches by itself: iOS may also change lens while you hold still, like the built-in Camera app — close up or in low light; at 1x that can flip between the wide and the ultra-wide.
Selected lens zoom applies when you have picked a single lens on the strip. Goes to the sensor’s maximum (default) lets that lens zoom as far as its sensor allows, with the dial dimmed past the zoom iOS recommends. Stops at the recommended zoom stops it there instead. AUTO always stops at the recommended zoom, whatever this says.
Remember lens and zoom reopens the camera with the lens and zoom you used last; otherwise it opens on AUTO at 1x. This row is part of the PRO pack — the lenses and the zoom themselves are free for everyone.
See Lenses and zoom for the strip, the dial, the zoom chip and what these three rows change on screen.
Backup and restore
All of these settings travel with the app’s settings backup, in the Viewfinder controls group — see Backup or share the app settings . The shutter timer belongs to the Photo capture settings group instead.
Related
- Focus — the AF button, locking focus, a saved focus, setting focus by hand
- Lenses and zoom — the zoom chip, the lens strip, AUTO or a single lens
- Shutter timer — the camera sheet and the countdown before a shot
- Camera lenses — where the camera screen’s lens controls live
- Camera settings — the rest of the camera screen’s settings
- Camera buttons and Bluetooth remotes — the hardware shutter buttons that keep working under the black screen
- Video recording, replay, and data overlays — the video mode the video light and microphone button belong to
- Backup or share the app settings — carry these settings to another iPhone
- What’s new in version 5.3