Notes overlay: the bottom text on your photos and videos
The notes overlay is the block of text along the bottom of the frame: what this photo is, where it was taken, when. It is built from up to three lines, and each line is built from the fields you put on it.
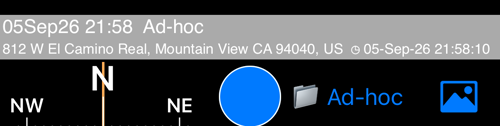
That is the default setup drawn on the viewfinder — line 1 is the title and the collection, line 2 is the address and the timestamp.
The same three lines are drawn in three places, from this one screen: the live viewfinder, the stamped copy of a photo, and recorded video. They also shape what a shared QR code carries.
Open MENU > SETTINGS, then Notes overlay. The row shows the current setup
without opening it: Show: YES (Medium), Number of lines: 2, Alignment: Left.
Show notes overlay
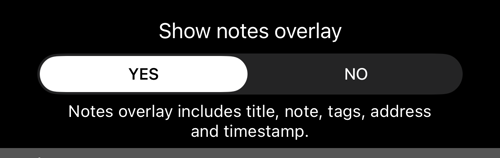
One switch for the whole block. NO removes it from the viewfinder, from stamped photos and from video — nothing else on this screen has any effect while it is off.
Switching it off does not stop anything being recorded: the title, the note, the collection, the address and the capture time are stored with every photo whatever the overlay shows. This screen decides what is drawn.
The three lines
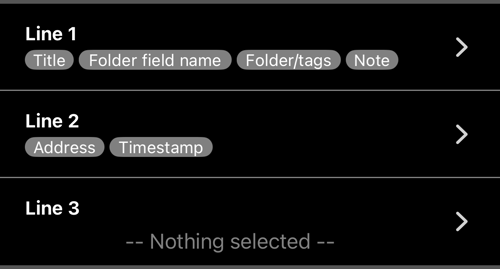
Each line carries a row of chips — the fields on it, in the order they will print. Out of the box:
- Line 1: Title, Folder field name, Folder/tags, Note
- Line 2: Address, Timestamp
- Line 3: empty —
-- Nothing selected --
A line with no fields is not drawn as a blank line. Empty lines are removed, not left in place: with line 1 empty and line 2 carrying the address, the address is drawn as the first line of the overlay. This matters when you are trimming a busy stamp down — you cannot leave a gap for spacing.
What each field prints
| Field | What appears |
|---|---|
| Title | the photo’s title, or the automatic title when automatic titles are on |
| Note | your note, folded onto one line — the note itself keeps its line breaks everywhere else |
| Folder field name | the collection field label you typed, not the collection itself |
| Folder/tags | the collection name, or the automatic folder when that is on |
| Address | the address, or the reverse-geocoded one when automatic addresses are on |
| Timestamp | ◷ and the time, in the format set in Settings > Timestamp format |
Fields on the same line are joined with a single space. Nothing is drawn for a field that has no value, so a photo with no note simply prints the rest of the line.
Adding and removing fields
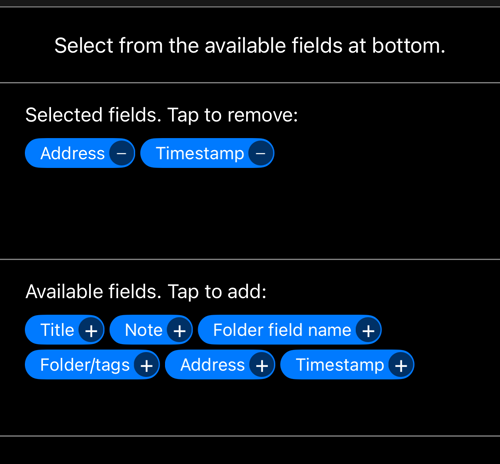
Tap a line to open its editor. The top half is what is on the line now — tap a chip to remove it. The bottom half is the six available fields — tap one to add it. The available list always shows all six, including the ones already on the line, because the same field can appear on more than one line.
The order you add them is the order they print. Re-adding a field moves it to the end of the line, which is how you reorder one.
Cancel leaves the line exactly as it was; only the tick saves.
Text alignment and size
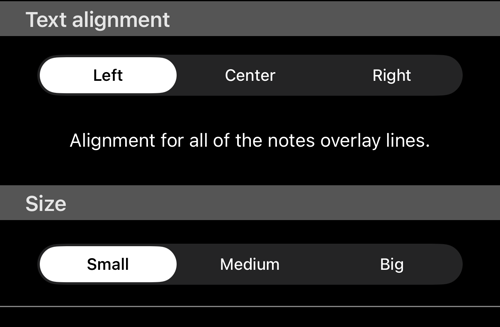
Text alignment — Left, Center or Right — applies to all three lines at once, as the line under it says. There is no per-line alignment.
Size — Small, Medium or Big — scales the whole block. Worth raising if the
stamp is going to be read on a phone rather than on a desktop, and worth
lowering when three full lines are crowding the frame. The size you pick is part
of what the settings row reports: Show: YES (Medium).
What is not on this screen
- Colours — the overlay’s text and background colours are on
Settings > Location & Notes overlay colors, shared with the location overlay at the top of the frame. - The timestamp’s format —
Settings > Timestamp format. See Timestamp, notes overlay, and file-name dates , which covers the date in file names and automatic titles too. - The values themselves — the title, note, collection and address are typed in the notes editor , not here. This screen only decides which of them are drawn, and where.
- The top of the frame — coordinates, altitude and direction belong to the separate location overlay.
Backup and restore
All of it travels with the app’s settings backup in the Notes overlay group: the switch, all three lines' fields, the alignment and the size. Restore it onto a second phone and both stamp photos identically.
Related pages
- The photo stamp — what a stamped photo looks like beside the original
- Notes editor — where the title, note, collection and address come from
- Notes editor settings — automatic titles, automatic addresses
- Timestamp, notes overlay, and file-name dates — the timestamp’s format and its other homes
- Photo capture settings — Original versus Stamped, and which copies are saved
- Watermark — your own mark, drawn over the top of all of this
- QR Code content — the same lines, carried in a scannable code