Photo GPX export
With huge thanks and appreciation to David K., who provided content for this page, requirements for the Photo GPX export and also tested this new export option! Thank you Dave!
Статья предоставлена на оригинальном языке.
If you use a digital camera, without GPS sometimes it nice to know where you took that special photo. With the app and the correct photo management application this is made possible with the export to Photo GPX option.
In this example I am going to use Adobe Lightroom 6 on Windows, but the basic idea is the same for many geotagging photo apps on Mac or PC
At the beginning of you day of taking photos, open the GPS Compass app and start logging your travel as normal, just put it in your pocket and forget about it, when you have finished for the day, don’t forget to stop logging your location or your exported file will be very large.
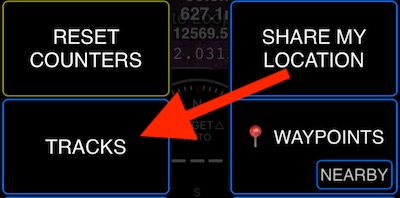
When you are ready to export your track go to the tracks section by, click on the MENU from the home screen,

Then go to tracks
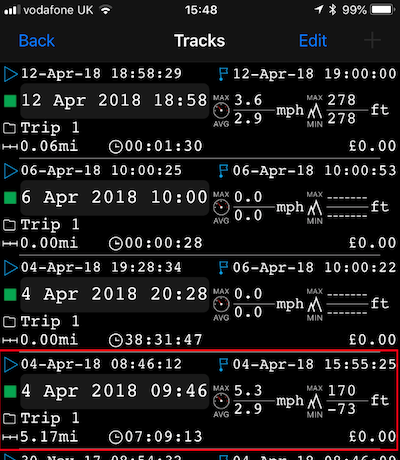
First select the track you wish to export from the track section of the software, in this case the 4th of April
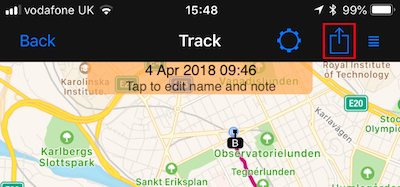
This will load your selected track on a map, this one as you can see was in Stockholm, to export tap the Box with the Arrow (Highlighted in red)
This will then ask if you want to email the file or save it to the local device or cloud service, in this example I have used email. (I find it easier just to email the file to myself)
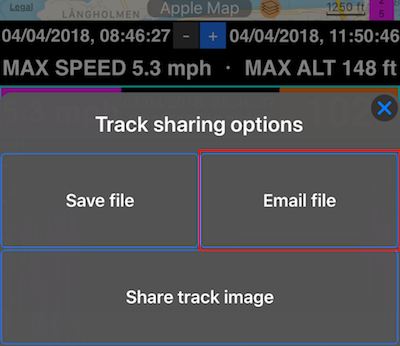
Then choose the new option “Photo GPX”

This will then create a file suitable for photo geotagging,
Note; if you track is long e.g. a full day, it will take quite a while to create this file (a few minutes or so) be patient, your phone is going as fast as it can!
It will show a progress indicator as pictured below whist its doing this

Open Adobe lightroom and import your photos as you would normally into a folder of your choosing, whist still in that folder,switch to the Map module along the top of the screen.
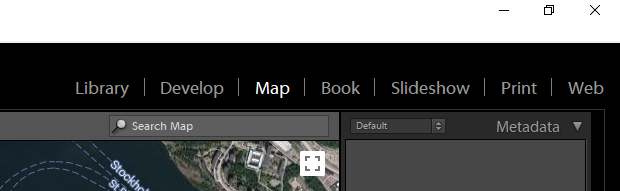
Then go to
Map ➔ Tracklog ➔ Load Tracklog
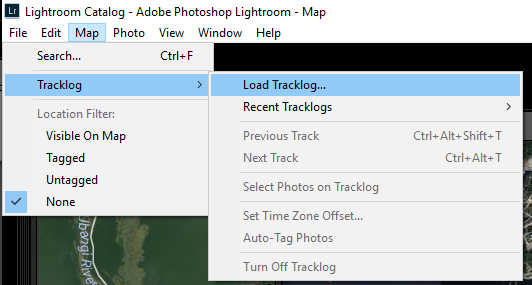
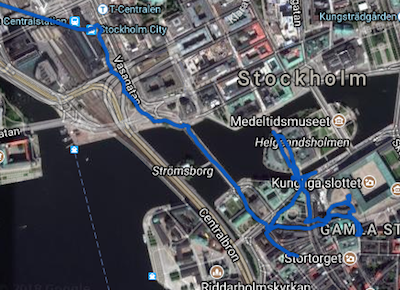
This will open a file section window, select your recoded gpx file you emailed to yourself and want to import
Once imported the map window will show your recorded track for the day superimposed on the map
At the bottom of the screen, select the photos you have taken that day
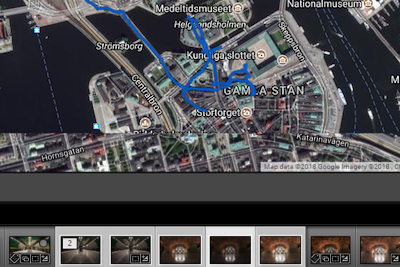
Just above your selected photos you will see a zig zag line icon (see below highlighted in yellow) click this then select “autotag photos”
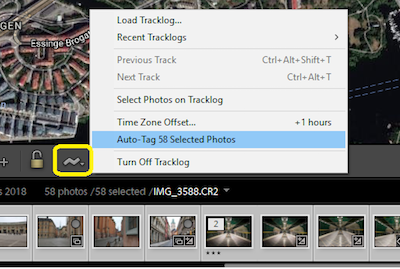
Important!
You will also see in the above menu “time zone offset” this is needed when your camera time is set to home, but the local time and the time on your phone are different.
Geo tagging working by matching the exact time you took the photo to the recorded time you were at that location, in the above example my camera was set to UK time or GMT, but the photos taken in Stockholm Sweden (GMT+1) for my photos to match I added a time zone offset of 1 hr
Geo tagged photos now appear on the map (yellow speech bubble) and location coordinates are written to the photo Metadata for use in other applications.

“Photo GPX” export options ensures that you’ll have a time/location sample per each second in the output GPX. Why it would not happen by itself? Imagine GPS would not be available for some time, and the app as well optimizes the track recording by filtering out some points to keep the track size smaller (Can be configured in Advanced Settings > GPS Tracking > Optimize recording).
David mentioned a long track export taking some time and indeed, the app needs to fill any gaps in GPS data with 1 sample per second - thus for longer time periods, it might take some time and expect the GPX file size to be bigger as well.
Except for these notes the rest of this page is based on David’s content. Thank you Dave!