How to use the taxi meter app on iPhone and iPad
This guide explains how to use Taximeter 55 to set up fares, start trips, add extras, create receipts, and manage taxi rides on iPhone or iPad.
It is especially useful if you need to:
- configure distance and time-based fares
- add luggage charges, extras, or discounts
- issue simple or detailed receipts
- understand the main controls before using the app on the job
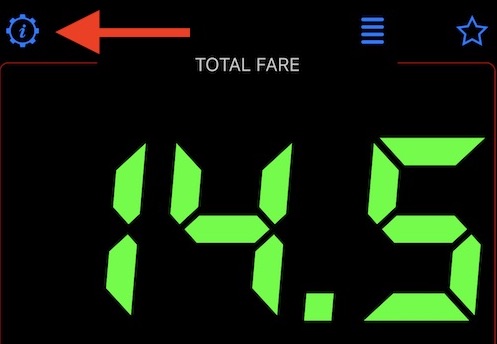
Taximeter main screen.

Landscape orientation.
Current taxi fare is shown in the center.
Taxi trip detail and controls are at the bottom.
Right side provides a tariffs switch, so you can change between selected tariffs with one tap.
Left side shows current speed, time and date
Portrait orientation.
Current taxi fare is shown at the center/top.
Taxi trip detail and controls are at the bottom.
Center part provides a tariffs switch, so you can change between selected tariffs with one tap.
Panel at the bottom shows current speed, time and date
Setting up taximeter to work with miles (mph) or kilometers (km/h)
Tap on a settings button to open general app settings:
Here you can configure if speedometer should measure and charge in miles or kilometers and also number of decimal places in the total fare:
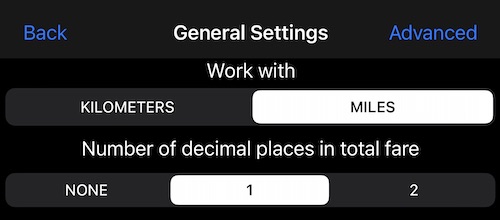
Need to setup advanced settings, such as receipt logo, receipt field names, automatic resolution for drop in/out address, Square integration details? Tap on “Advanced” settings button on this screen.
Here is more on Advanced settings
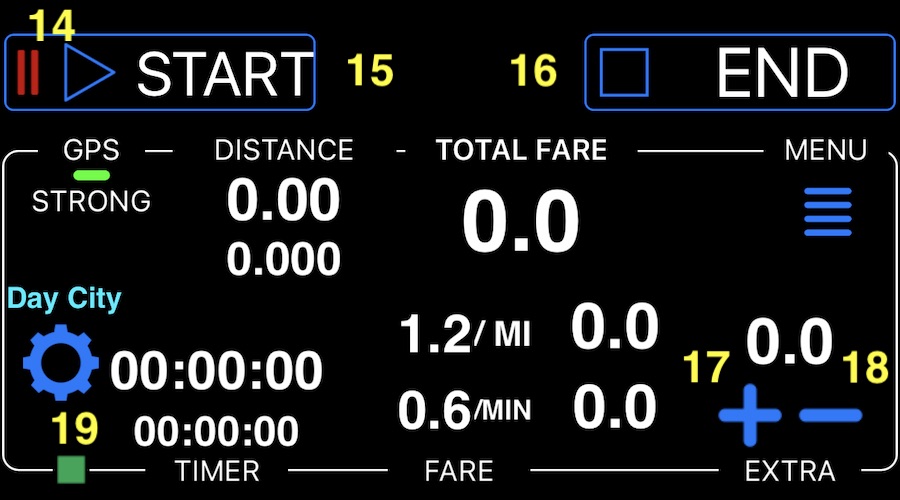
Controlling taxi trip.
Taxi trip panel allows you to manage tariffs and control taxi trip including extras:
![]()
Lets go through the controls here:
1. Tariffs control button. To manage tariffs and apply the active one. You can change tariffs as you drive.
2. Total driven distance.
3. Charged distance. Dependent on tariff some parts of a trips might be charged per km or mile and some per minute. Here you see the distance that was charged for the whole trip.
4. Total trip time.
5. Charged time. Same as charged distance, dependent on a tariff you may for example only charge for time when speed is lower than 10 mph or km/h lets say. The rest might be charged per km or mile.
6. Fare per km or mile. If your speed setting is mph, you’ll see mi (miles) here. If your speed setting is km/h, you’ll see km here. This is a distance fare you set in tariff settings.
7. Fare per minute. Again, you set this up in a tariff.
8. Total fare for a charged distance.
9. Total fare for a charged time.
10. Total of extra charges in this trip. There is no button to add any yet, but we have not started the trip!
11. Button to start the new taxi trip.
12. Total fare, both for distance and time.
Configuring the tariffs.
Before we start our taxi trip, let’s configure a tariff. Tap on a button #1 and you’ll see a list of tariffs, now empty:
![]()
You can either add a fare by manually entering all of its parameters, like price per mile/minute, etc, or you can see if the fare you’d need would not already exist in the taximeter’s web library.
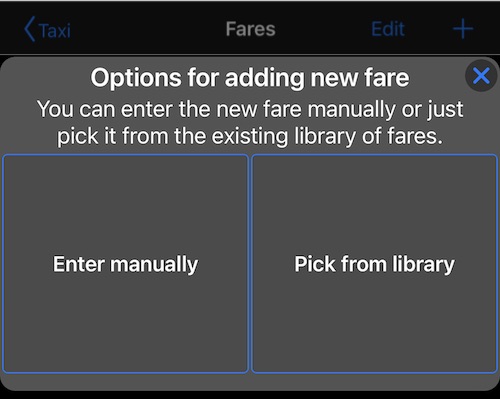
Let’s go through the manual fare set up:
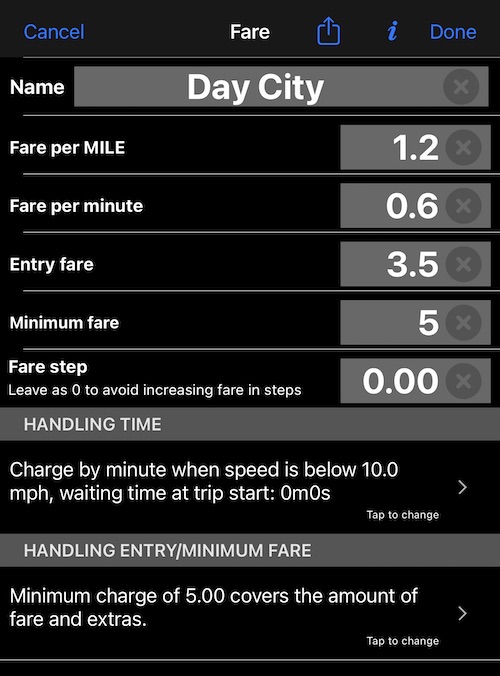
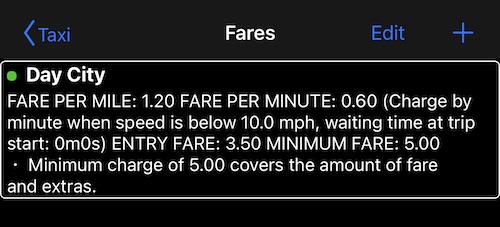
What’s in tariff?
Tariff name - whatever suits you, it will be shown upon the tariff control button on the main screen.
Fare per MILE, Fare per minute
Entry fare - this is a one off charge to add to the trip when it is started.
Minimum fare - that’s minimum charge for a trip. Let’s say entry fare is 3.5 and minimum fare is 5. Then upon trip start, total fare will be 5 and extra charge will 3.5. As you drive or time passes but total charge is still less than 5, 5 will be shown as a total charge. Once sum of extra charges and distance or time fares will cross 5.0, total fare will start showing increasing numbers 5.1, 5.2 etc …
Time charge specifics - If you want to charge for time all the time or limit time charge for when you wait or speed is lower than some threshold, this is a section for you.
See for yourself what is the best tariff for you, and you can always experiment!
Can you start our taxi trip now? We are getting close to it ;)! Tap on the row with a tariff you want to use:
and return to a main screen.
Starting the trip and adding extras.
So passengers are in the car, with their heavy suitcase back in the trunk, we can now tap on the “NEW TRIP” button:
You can see all counters were zeroed and trip is now paused (pause image #14 is blinking now). You can start a trip with button #15 or stop with button #16. A track indicator #19 shows that a new track has been created for this taxi trip (not important for us though).
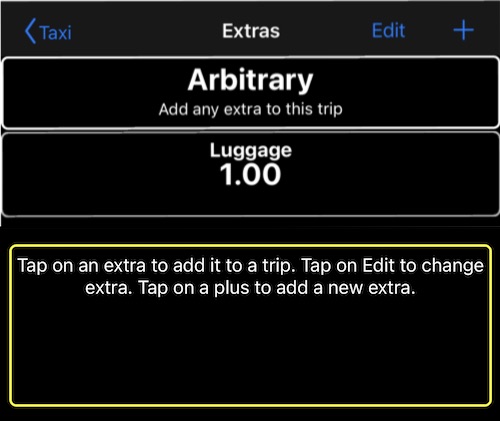
Now we want to charge for that heavy suitcase in our trunk? Tap on button #17 to open extras window:
![]()
Here you can either add any arbitrary amount to a total fare by tapping on “Arbitrary” or as we are going to charge for luggage quite often, lets create a separate entry for it, by tapping on a plus button:

For discounts, set a negative amount here, using the “-” button.
Now, whenever we want to charge for luggage we can just tap on the Luggage row in the extras list:
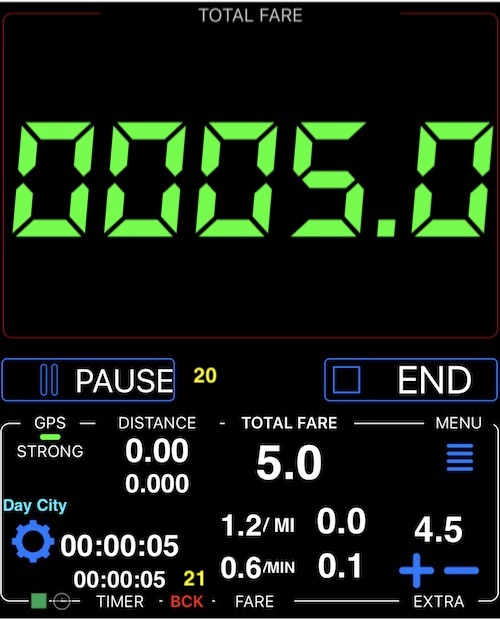
After we tapped the taximeter screen looks like this (number of decimal places for big cost digits can be changed by double tap on them or in the settings):
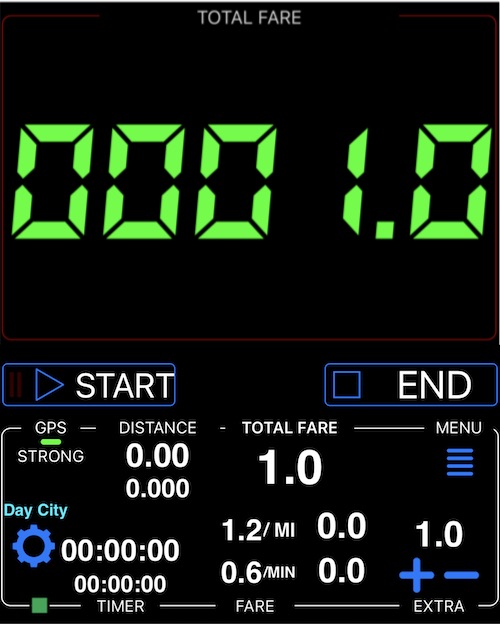
You can see 1.0 is added to the total fare. And now it is finally the best moment to tap on START button and start driving. Let’s see what happens on the screen:
Minimum fare was applied, it was 5.0, so taximeter show 5.0. In extra field it shows 4.5. Remember we setup 3.5 as an entry fee for this tariff and also applied 1.0 for a piece of luggage, so it gives 4.5 for extras now. Also we can see new button #20 that pauses the trip and running charges. Background work indicator #21 shows you that app works in the background, so time, distance and charges will run even if the device screen is locked, call is in progress or you use other apps meanwhile (like navigation, for example). First time you start a taximeter, it will offer you to work in background automatically, we highly recommend you tell “OK”.
I’m not going to actually drive for this walkthrough. Because we set a time charge for speeds below 5 mph, I can just sit and wait until the accumulated time charge exceeds the minimum fare — here’s what that looks like:
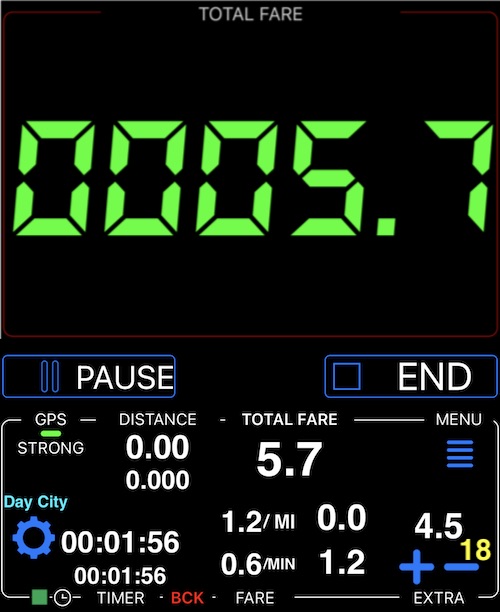
You see, now the charge for time is 0.6 and as extras of 4.5 and time charge are greater than minimum fare now, taximeter already shows 5.7.
You can also see and manage extras charged in this trip, use button #18, to invoke the trip extras list:
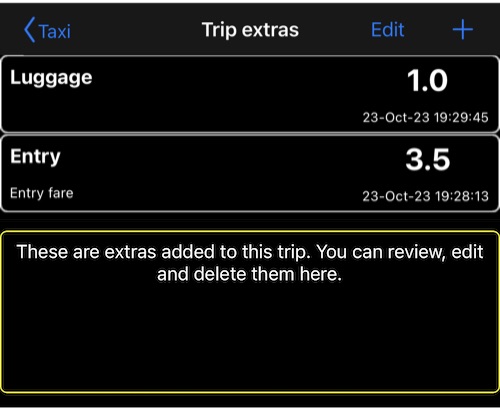
We can see here all the extras we have applied and delete them swiping on the row or using the “Edit” button.
Once we reached the destination we can use the END button:

Taximeter is put on pause and you can either resume the trip by START button or clear/delete it totally with that rubbish bin button #22. So it is a good idea to settle the fare with a customer before tapping on a rubbish bin as you still have access to the trip extras. TIP: A discount you give to a customer can be an extra with negative value!
Button #23 opens a receipt screen. Receipt screen provides options to ammend the receipt total (tip of discount), edit customer data or note, edit start/end address and share the receipt.
You can pick from the simple or detailed receipts.
Receipt screen also provides options for payment via Square Point of Sale or SumUp credit card terminal.
One tap tariffs switch.
It would be handy to switch between tariffs even while you drive and tariffs switch panel fulfills exactly this purpose. By default every newly added tariff is added to this panel as well. If it gets crowded here one day, you can hide some of the tariff by tapping on a “Fares” button and tapping the unneeded tariffs out:
![]()
If you still need to use these “rare” fares that are not present in the tariffs switch, you can just tap on the settings button #1 in the taxi control/details panel and pick the tariff from there to make it active.
Feedback and support.
Tap on a star button to open feedback and support settings:

Options here are:
1. Leave an app review or rate the app in the AppStore. We are always eternally grateful for your kind reviews.
2. Send an email to the app developer with a support request or a suggestion. We do respond within 24 hours to every support email.
3. Open the documentation and QA site — the page you’re reading right now.
We hope you’ll like the taximeter app and we are totally open to your feedback and suggestions!