Route editor — draw a road book's route on the map
A road book usually starts with a drive: you record the road, and the track becomes the route. The route editor is for the road you have not driven yet. You draw the route on the map, and the app turns it into a route a road book can use — measured along the real road, with the terrain for the printed elevation profile, and with course notes at the exact distances where they belong.
Your finger does not have to be precise. A trace only chooses the road; the road itself supplies the line.
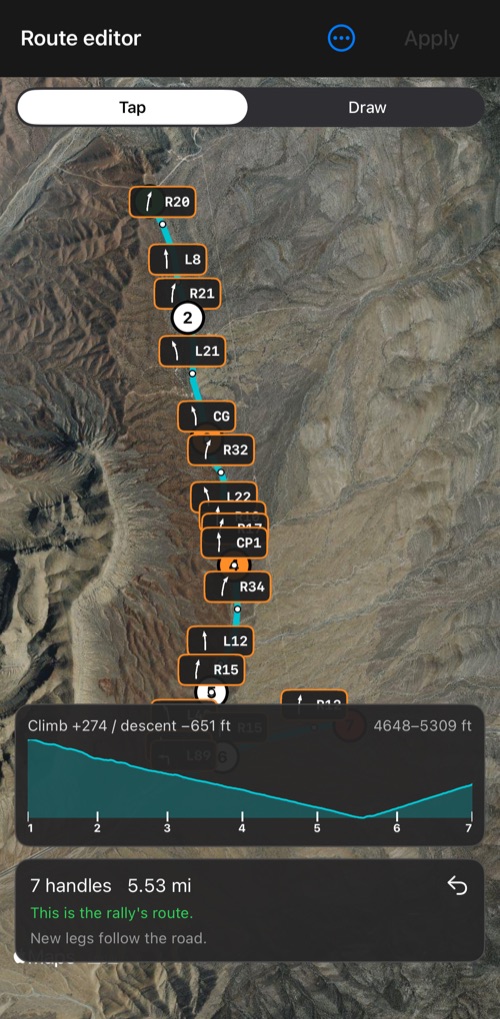
Quick start
- In Rally settings, under Road book > Route, tap Build the route on the map.
- Tap the map where the route starts, then where it goes — or switch to Draw and trace the road with one finger.
- Wait for each stretch to snap to the road. Check anything drawn in orange.
- Tap Apply. The drawing becomes the rally’s route; add the route’s turns as course notes if you want them.
- Leave the editor, then print or share the road book or drive it.
Open the route editor
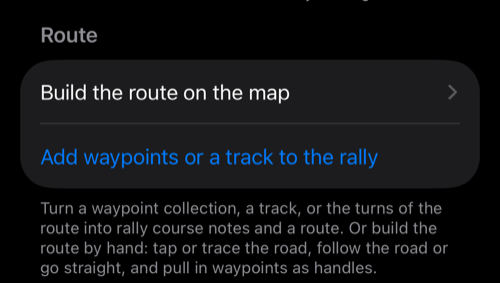
Open Rally settings and, in the Road book group, tap Build the route on the map in the Route section. The screen is called Route editor. The Route section is hidden while a rally session is running.
Place handles
The route is a line through handles, numbered from 1. Between two handles is a leg. The picker at the top chooses how you place handles: Tap or Draw.
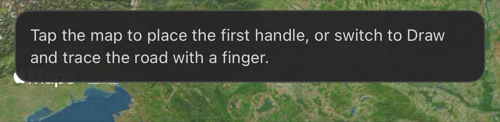
Tap
- Tap an empty spot on the map to add a handle at the end of the route.
- Hold a handle and drag it to move it.
- Tap a handle or a leg to open its card.
- One finger moves the map, a pinch zooms it.
Draw
- Trace the road with one finger. The trace becomes a few handles along it, and each leg is asked of the road network.
- Two fingers move the map and a pinch zooms it; the map holds still while you draw.
- While you draw, a small label next to your finger shows what the stroke adds and the route’s total length.
- A second finger landing mid-stroke pauses the stroke; carry on with one finger to continue it.
- A stroke that starts near the last handle continues from it. Anywhere else, a leg joins the two.
Switch back to Tap before editing: in Draw, a finger on a handle starts a stroke.
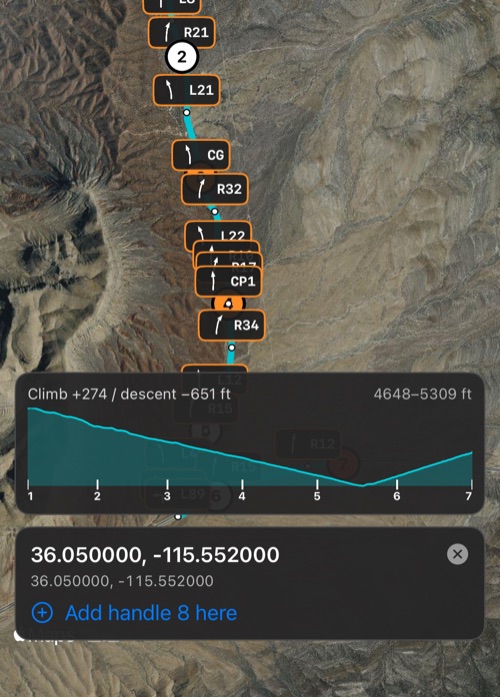
Search. ⋯ > Search a place, coordinate or waypoint… finds a place or address, a coordinate (degrees, degrees and minutes, degrees minutes and seconds, UTM or MGRS) or one of your waypoints. The result is pinned in yellow with a card, and Add handle N here puts a handle exactly on it. This is the precise way to place the start and the end of a route: a handle placed from a coordinate is a surveyed point, like a waypoint — the route goes to it, and it is never moved onto the road.
Waypoints. ⋯ > Add waypoints from a collection… adds the collection’s waypoints as handles, in the collection’s order. Each becomes a course note when you apply the route (see Course notes on handles ).
How handles look. The start is green, the finish red, the handles between them white, a waypoint or note handle orange, and the selected handle has a yellow ring. When a leg’s road arrives, the handles you tapped or drew move onto the road. Waypoint handles and handles placed from a searched coordinate never move — the route goes to them, and still does after you save the book and open it again.
Tap a handle for its card: its distance from the start and its coordinate, Make this a course note and Remove handle. The card’s title also says where the handle came from — drawn, coordinate, waypoint or course note. Removing a handle in the middle joins its two legs.
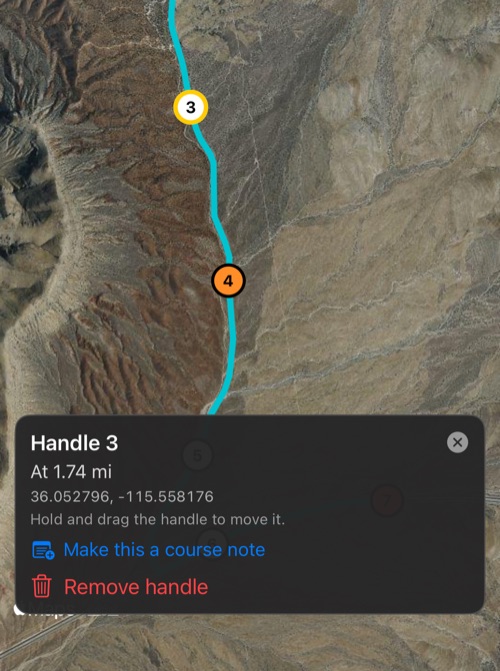
Legs: follow the road, straight, or as drawn
Each leg is one of three kinds:
| Leg | On the map | What it is |
|---|---|---|
| Follow the road | teal | the road between the two handles, from Apple Maps directions |
| Straight line | white | a straight line between the handles — open ground, a field, a crossing |
| As drawn | mint | the line your finger drew, kept as it is — a track no road network knows. Offered only for a leg made by a stroke. |
New legs take the kind set in ⋯ > New legs. With Follow the road, a leg you add by tapping snaps to the road; with As drawn, a leg you add by tapping has no stroke to keep, so it is a straight line.
Tap a leg for its card. It shows the leg’s length, lets you switch its kind, and offers Add a handle here to split it where you tapped. When a road leg is 1.25 times the straight distance or more, the card says so (“2.5× the straight line”) — information, not a warning.
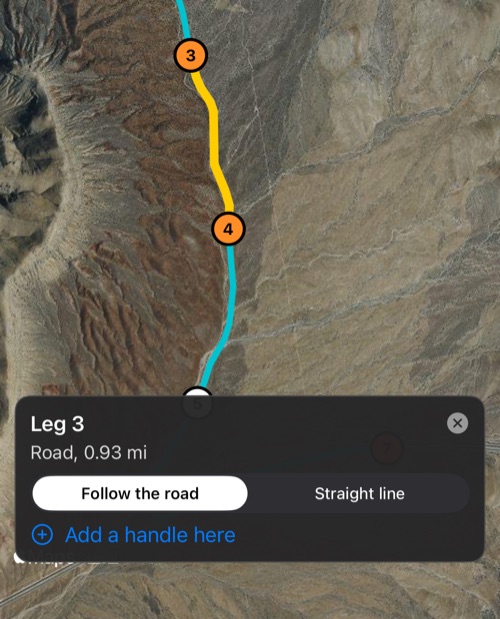
Colours that ask for attention
- Grey dashed — the road network is still being asked.
- Orange — worth a look. Either the road runs more than 100 m from where you drew, or it loops back: it passes a handle and comes back to it, which is what a one-way street or the wrong side of a divided road makes directions do. Tap the leg to read which; usually dragging a handle onto the road you meant fixes it.
- Red dashed — the road network could not be reached. The leg is straight for now.
A long twisty road is not flagged. Orange is a warning, never an error: the route still builds.
When there is no road
| What happened | What the editor does | Undo |
|---|---|---|
| A new handle (tapped, drawn or added on a leg) where no road reaches | The handle is dropped and its neighbours are joined: “No road there — handle 3 dropped” | yes |
| A handle moved where no road reaches | It goes back where a road last reached it: “No road there — handle 3 put back” | yes |
| No road to a waypoint handle | The waypoint stays; the leg becomes a straight line | — |
| A leg switched to Follow the road with no road between its handles | The leg goes back to straight | — |
| No connection, or Apple Maps not answering | Nothing is dropped or moved. The legs are drawn red dashed and straight for now, and the status card offers Retry and Keep straight | — |
The terrain profile
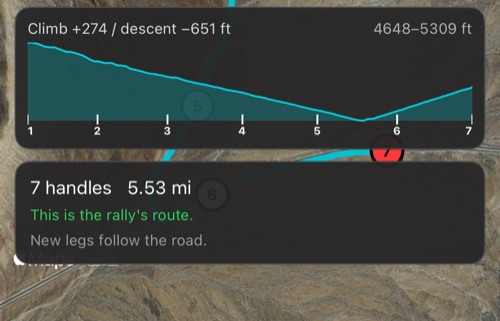
Once the drawing holds still and every road leg has its road, the editor asks for the terrain under the route. A strip above the status card shows the profile: distance across, height up, the climb and descent, the band of heights, and a tick for each handle with its number where it fits.
When you apply the route, these heights are written into it. The printed road book then has its Elevation and Climb / descent rows and the elevation profile, as a book from a recorded drive does. Without a connection, or where the service has no height for part of the route, the status says No terrain for this route and the book prints without its elevation rows; everything else works.
Course notes on handles
A handle can carry a course note of its own, which is placed at the exact distance the route reaches that handle — not projected onto the route afterwards.
- Tap the handle, then Make this a course note.
- Type the instruction (for example Cattle grid) and, if you want, a marker (for example CP1), and tap Save.
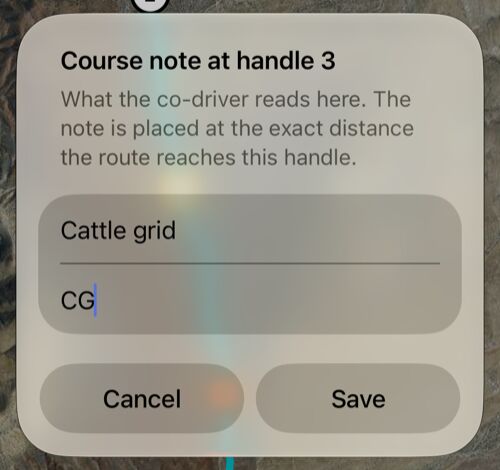
The handle turns orange, and the note is added to the book when you apply the route. Edit note changes the words, Take the note off makes it a plain handle again. Waypoints you added as handles become notes the same way, with the waypoint’s name as the marker and its note as the instruction.
- The instruction and marker can be edited on the handle’s card or in Course notes . Both show the latest words.
- Tulip diagrams, symbols and remarks are added in Course notes once the note is in the book.
- A note you delete in Course notes stays deleted: the handle stays on the route and makes no note until you use Make this a course note again.
Undo
Every change is one step, and ↶ undoes the last one; ⋯ > Undo names the step it would undo. A change with a consequence you might not see — a handle removed and two legs joined, a route reversed, a stroke that made six handles — is confirmed in a short message with its own Undo. Adding a handle by tapping, and dragging one, say nothing: the map shows it. Roads already found are kept when you undo.

Apply
The Apply button is enabled only while the drawing differs from the rally’s route. The status card says which: This is the rally’s route in green, or Not applied yet in orange.
When you tap Apply:
- The drawing replaces the rally’s route, with its terrain. Any track the route was linked to is unlinked.
- The handles are stored in the book, so the route reopens editable later — also from My rallies and in a copy you share.
- The book’s course notes are brought to the new route (below).
- If some legs are still snapping, you are asked to Wait or Use them straight.
A summary tells you what happened, with OK and Undo. Undo restores the route, the handles, the linked track and the notes as they were. Later, ⋯ > Undo the last Apply does the same, until the next Apply or until you leave the editor.
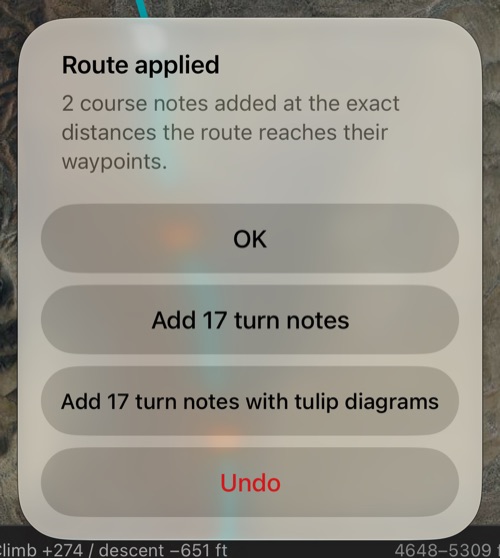
Turn notes. When the route has turns and the book has no generated turn notes yet, the summary offers Add N turn notes and Add N turn notes with tulip diagrams. A turn close to one of your located notes joins that note rather than adding a row of its own. If you later change the road under generated turn notes, the summary names the ones that no longer describe it and offers Regenerate the turn notes.
What happens to the notes already in the book
| Note | On Apply |
|---|---|
| From a waypoint or note handle still on the route | Moved to the handle’s new distance; its words and pictures are kept |
| From a handle you removed | Removed — the route no longer reaches that point |
| From a handle you added | Added at its exact distance |
| Any other note with a location within 250 m of the new route | Re-measured along the new route |
| A located note farther than 250 m from the new route | Kept with its distance, and listed for you to check |
| A note with no location | Untouched |
Tulip diagrams follow the road. A tulip drawn from the route is redrawn from the new road under its note. A tulip you drew yourself in the turn designer is never changed.
Notes off the route. When notes are left off the new route, a card lists them one by one with their distance and how far they are from the route; tap one to see it on the map. For each, choose Move onto the route, Remove or Keep as it is — or Move all onto the route / Keep all for the rest.
Clear, remove, or undo
Three commands look alike and do different things:
- ⋯ > Clear the drawing clears the handles on the map. The rally keeps its route and notes: the route is shown in grey underneath, and the status card says so in orange. ↶ brings the drawing back.
- ⋯ > Remove the route from the rally removes the route and the notes that only existed because of it — the generated turns and the notes made from handles. Notes you typed and imported checkpoints stay. You are asked first, and the summary has Undo.
- ⋯ > Undo the last Apply puts the route and notes back as they were before the last Apply.
The grey line is always the rally’s current route, shown whenever the drawing on the map is not that route — after clearing, or while an edit is not applied yet.
Nothing is lost
The drawing is saved as you work. Leave the editor with ‹, or close the app, and it is there next time with the notice Unfinished drawing restored — Apply makes it the rally’s route, Clear the drawing discards it. An unfinished drawing belongs to the rally it was made for and is never included in a saved or shared copy of the book; the applied route and its handles are.
Edit a route you already have
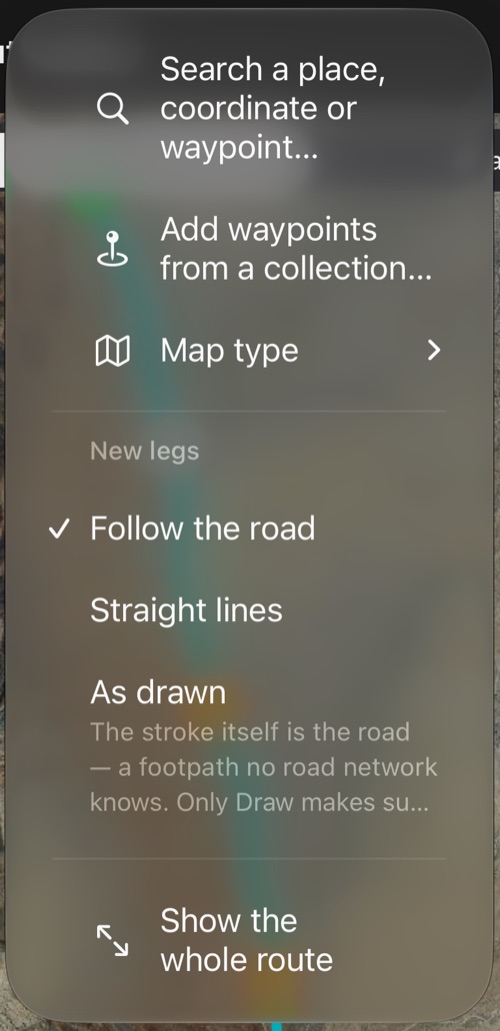
The ⋯ menu also has:
- Trace the current route into handles — lays handles along the rally’s route (a book from a track or a file), about 400 m apart and at most 40, so a driven route can be edited by hand. Notes made from handles and waypoints become handles of their kind again.
- Reverse the route — turns the handles round. Road legs are asked again, since a road driven the other way is not always the same road.
- Show the whole route and Centre on my location.
- Map type — Standard, Satellite or Hybrid. Satellite helps with tracks and junctions; the choice is remembered and shared with the note picker.
- New legs — the kind of leg new handles make.
Good to know
- Roads come from Apple Maps directions, and the terrain from an elevation service: both need a connection. Without one, draw straight or as-drawn legs and apply again later.
- The editor’s map is Apple Maps only: no Google maps, offline maps or coordinate grid.
- This editor draws the route of a road book. To turn a waypoint collection into a route on the main map, see the main map’s route editor .
- For a single note, you can also place it on the map from the note itself — see Pick the place on the map .
- What the book is for — Navigation or A regularity rally — is chosen in Rally settings , after the route or before it.
Related:
Rally book ▪︎ Rally settings ▪︎ Course notes ▪︎ Route map ▪︎ Rally computer