Road Survey — Road Surface Quality Measurement
Measure how rough, harsh, or smooth a road section feels with your phone. Road Survey is useful for comparing lanes, checking resurfacing results, documenting rough routes, or keeping a repeatable record of road quality over time. Every session is linked to a GPS track, so you can review the result in the context of the exact route section you measured.
Best for
- municipal or maintenance comparisons before and after repairs
- repeated checks of the same road section over time
- comparing lanes, routes, or surface conditions with one consistent setup
When to use this
Use Road Survey when the real question is whether one lane, one section, or one resurfaced route is smoother or rougher than another.
When not to use this
Do not use Road Survey when the main variable is mount stability or recording quality. For that, use Camera Rig .
What you get
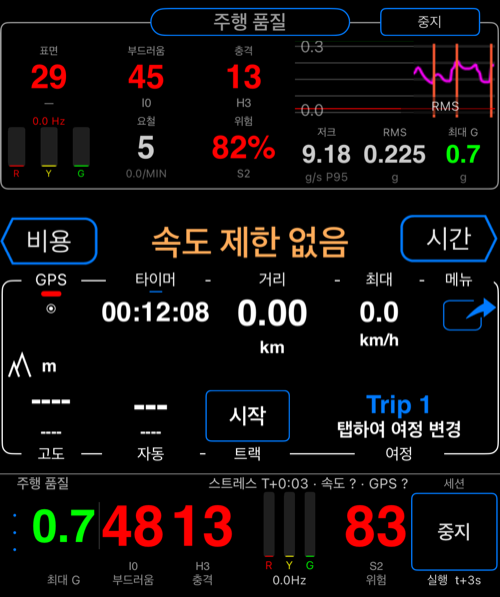
- a live roughness-oriented score view
- a saved session linked to the exact route by GPS
- repeatable comparison across lanes, sections, or dates
- a report you can share after labeling the run
FAQ
Can I compare resurfacing results with my phone?
Yes. That is one of the strongest uses for Road Survey. Run the same section before and after the work, keep the mount setup the same, and compare the sessions.
Can I compare one lane against another?
Yes. Keep speed, vehicle setup, and phone position as consistent as practical, then compare the lane runs as separate sessions.
Mode
Open MENU > Modes > Engineering > Road Survey.
Use this mode when you want to assess road condition, compare lanes or road sections, or repeat the same route before and after patching, resurfacing, or seasonal changes.
Central area
You can also install the Road Survey central area directly: open the main panel menu, choose Pick what to show here, then in Screen area options > Engineering choose Road Survey.
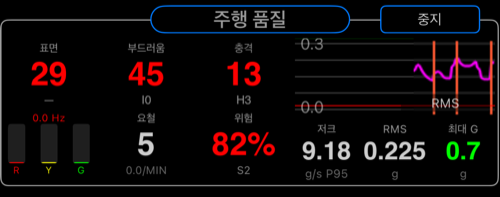
The central area gives you the main surface score, the stability and impact channels, and the graph for the active run.
Micro area
You can pair the central area with the compact Road Survey micro area: open the micro panel menu, choose Pick what to show here, then in Screen area options > Engineering choose Road Survey.
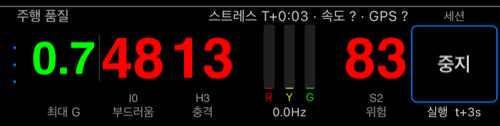
The micro area keeps the current surface condition summary visible while leaving room for other dashboard content.
Settings
Road Survey uses the shared Motion Quality settings screen.
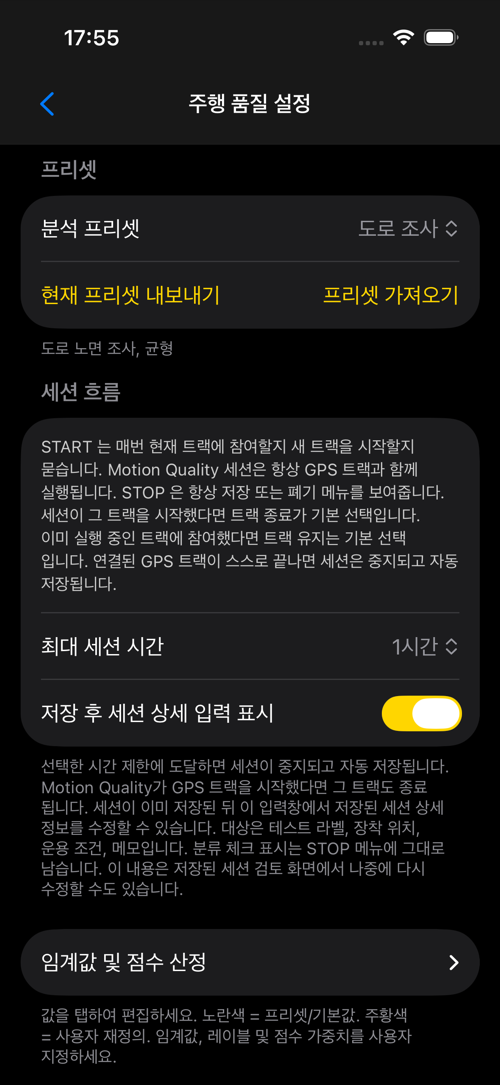
Preset is the first thing to review. Start with Road Survey when you want the surface-assessment profile with balanced sensitivity and rigid-mount assumptions.
Session flow controls max session duration and whether the saved-session details prompt appears after saving.
This matters because Motion Quality sessions always run with a GPS track. START asks whether to join the current track or start a new one. STOP always gives the save or discard flow. If the linked track ends by itself, the session also ends and auto-saves.
Thresholds & scoring is where the Road Survey profile differs most. It weights stability and impact equally, gives more importance to bumps and roughness, and uses proportional band-energy scoring to reflect broadband surface texture.
This area also gives you the real tuning controls:
- change
Frequency scoring - change
Score weights - rename the displayed score labels
- save your current setup as a custom preset
- export or import presets
- reset everything back to the selected preset
So if you develop a useful road-comparison setup for one device and mount, you can preserve it and reuse it later instead of rebuilding it by hand.
Live alerts is optional and mainly useful if you want immediate feedback while collecting a run. The categories are separate:
Hard impact alertsDevice stress alertsInstability alertsHapticsSound
That lets you keep roughness feedback on while leaving the other alert types off if they are not useful for your survey work.
Good first setup
- start with the
Road Surveypreset - use a rigid mount or a very consistent phone position
- run a baseline on a road section you know well
- compare a second section or a repeat of the same section under different conditions
Want a complete workflow? See How to Measure and Compare Road Surface Quality .